Have you all just wandered around a home improvement store lately? I’m telling you, even if you don’t have a DIY house project to work on, you’ll still walk out with project ideas you never knew you wanted to make.
Last week when I was in Lowes getting beadboard for my drawer-turned-farmhouse cabinet, I was browsing the end caps on my way up to the cash register,
...and there it was – the next project I had NO idea I wanted to make.
On one of the end caps was a box of plain white, builder grade tile. There isn’t much that’s exciting about plain white builder grade tile, but when I saw the price, I was suddenly convinced it’s the next best thing to peanut butter and jelly..
My hands were full with beadboard, and I was kicking myself that I didn’t get a cart, but I knew my next project was going to be photo coasters.
I made a mental note, and hoped I wouldn’t forget it before I got back home, and for once, my mental note actually stayed in my brain! 🙂
The next day I marched back to Lowes, and I bought that amazing builder grade white tile, forking over less than 75 cents for all 4 of them. Yep…you heard me right!
I felt like I was doing something illegal taking it out of the store, but I made it out to my Jeep without a manager chasing me down, so I guess the price tag was correct.
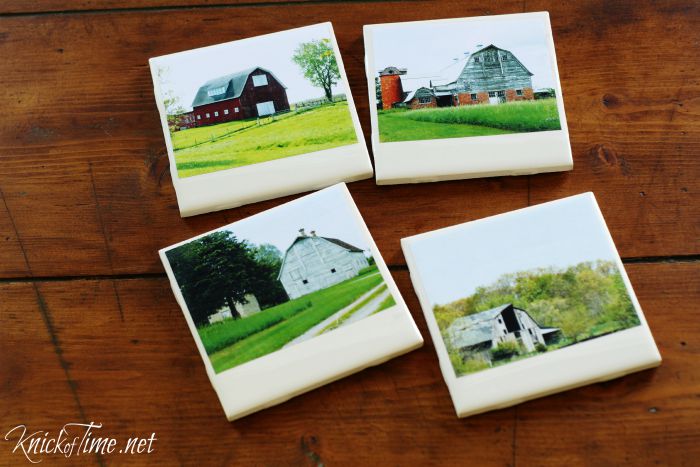
I’ve been wanting to make a gallery wall with all the barn photos I’ve taken, but I don’t have a wall to make a gallery on, so barn photo coasters would be the next best thing!
(barn photo printables are HERE).
To make your own, make copies of 4 photos sized at 3-1/2″ x 5″, then crop them down to about 3-7/8″ wide x 3-1/4″ tall. Your copies need to be made with toner ink, so if you don’t have a laser printer, save the images onto a flash drive and take it to a copy center like Staples to get copies made. Ink jet ink will not work, as the ink will smear.

The only other supplies you’ll need are:
- foam brush
- school glue
- adhesive felt circle pads for the bottom of tiles
- Modge Podge Clear Acrylic Sealer ( I used matte, but you can use glossy also.)
After cutting out the photos, brush school glue mixed with a bit of water on the back and position photos on the tiles. Smooth out any air bubbles right away.

Put another coat of glue over the top and allow them to dry fully.

Once they are all dry, spray over the coasters with the Modge Podge sealer to protect the images from moisture.
That’s all there is to them! These are so easy, so quick and so cheap!
Imagine what cool gifts these would make! They look like Polaroid photos, and you can use the extra space at the bottom to write a note with a Sharpie.
Wouldn’t Grandma love to get a set with her grandchildren’s photos on them?!
And teacher’s would love them with antique school book images on them!
You could also make a set with photos from your vacation, or photos from your garden – really you could put any photo on them, and they will look awesome!
Make a mental note to make these as Christmas gifts, or you could also pin it to help you remember! 🙂
![]()

I hope your week is off to a great start!


This is SO happening in my world Angie – thanks for the inspiration. LOVE these!!!
I love this idea.We all have pictures we would like to see and remember and this is a great idea. Thanks Angie.
You are so brilliant. I absolutely love them. I think these would make awesome hostess prezzies.
Angie,
What a fun project. 🙂 I love the way they turned out!
Happy day friend!
karianne
They look lovely, Angie! I had something similar that in mind for a set of 4 Chrismtas coaster I’ve had for years and never used. I hesitated so far because I was not sure what a hot mug of coffee would do to the sealer. Have you tried that or do you use them only with cold beverages?
They look lovely, Angie! I had something similar in mind for a set of 4 Christmas coasters I’ve had for years and never used. I hesitated so far because I’m not sure how the sealing will react if I put a mug of hot coffee on it. Have you tried that or do you use them only for cold beverages?
Julia, I don’t drink many hot drinks, so I haven’t tried using the coasters for hot drinks yet. They are so inexpensive to make though, it’s worth a shot!
Hi Angie, I’m sorry for the double comment but my first comment hadn’t shown, even after refreshing. Now it’s there. Strange.
This is SO awesome! I love the look of polaroids, and this is total genius! And I’m thrilled to find out that finally there’s something that you need a laser printer for instead of ink jet. For printable sewing products, you always need ink jet, so I can never use them! 🙂 Lisa