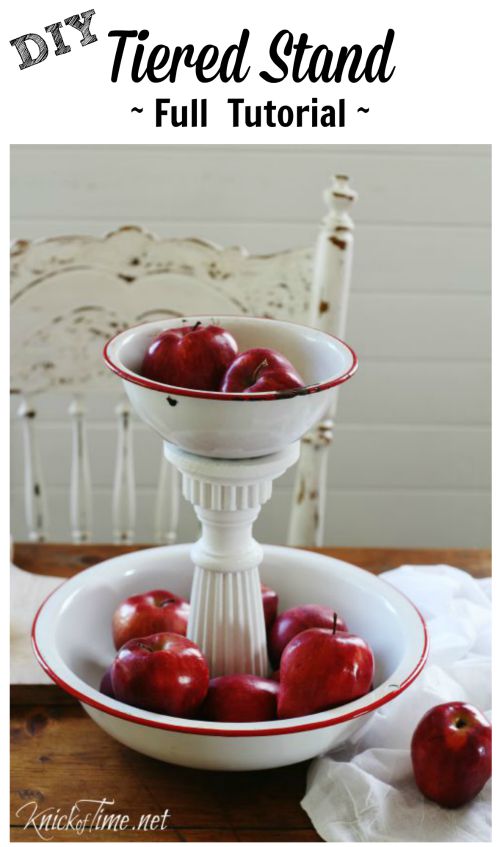
Over the last several years, I’ve received lots of questions about the tiered stands my husband and I make, so I finally got around to photographing the steps for it so I could write up a tutorial, and show you how to make your own!
I’ve seen these made different ways, usually using glue to hold the pieces together, but glue isn’t always the sturdiest thing, so we came up with what we think is a better method.
I generally use old enamelware bowls for the stands. I get a larger bowl for the bottom of the stand and a smaller bowl for the top.

You’ll also need something strong for the “spindle” that connects the bowls together. We’ve used things like fancy chair legs, but for this stand, I picked a section from an antique bed headboard.
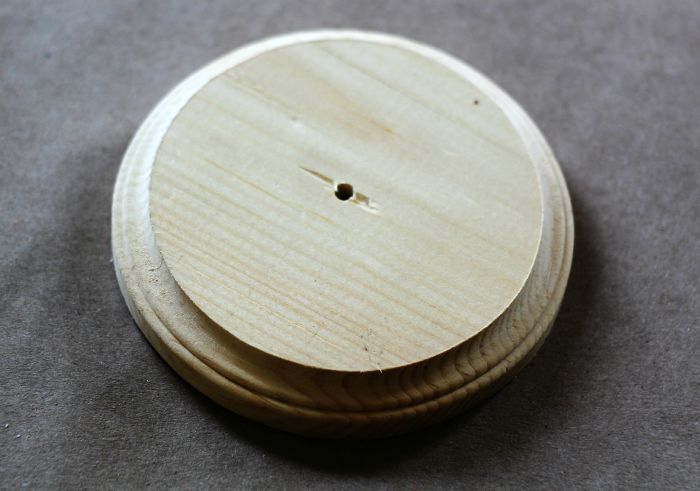
And you’ll need wooden round plaques for each bowl. I used a 3″ plaque for the smaller bowland a 5″ plaque for the larger bowl.
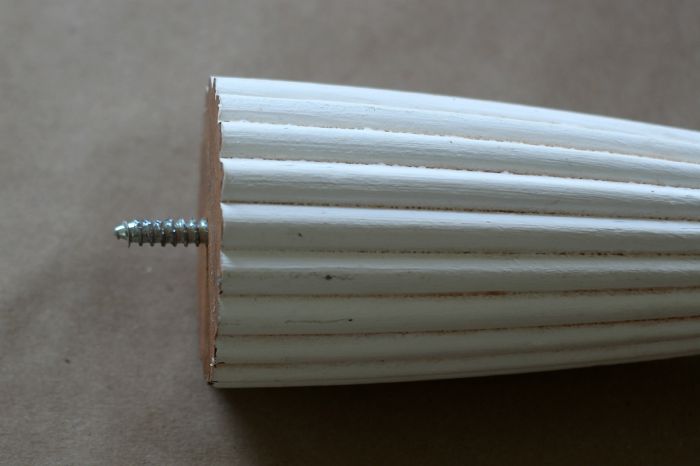
Determine the height you want between the lower bowl and the top bowl, and cut the spindle to size. Mine was cut about 8″ long. If one end of your spindle is tapered, make sure you cut where it’s wide enough to allow a screw to go into it.
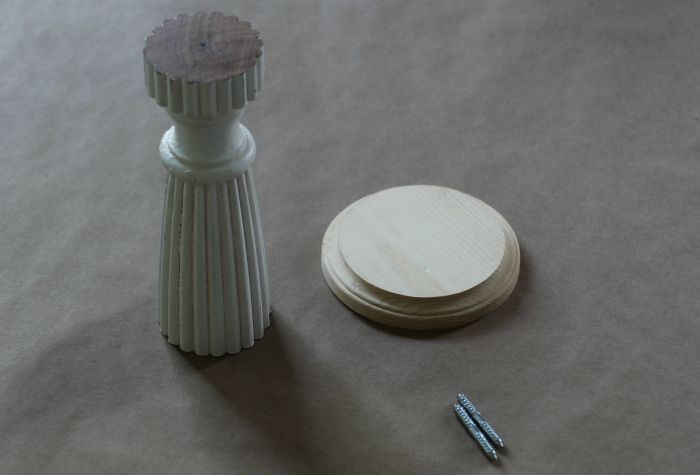
You’ll need double ended threaded screws. I only need one for this tiered stand, but if you use more than 2 bowls, you’ll use additional screws.

You’ll need one other type of screw also, called a chrome trim screw. The come in different lengths and have a finish washer under the screw head. The washer keeps the screw head from going through the bowl, which can be a problem on older, rusty bowls.

The first thing to do is drill pilot holes in center of both of the wooden bases, and the bowls. If you don’t know how to find the center, here’s a great tutorial.
When drilling the hole through the bowls, put a junk piece of wood underneath it.

Because the spindle is smaller, we just”eyeball” the center and drill the pilot hole.

Paint both of the wooden plaques and the spindle and let them dry.

Now, it’s time to assemble the tiered stand.
Holding the double-ended screw with pliers, thread one end into the spindle. Leave enough of the other end of the screw exposed to thread it into the larger wooden base, but not protrude outside of it.
Here’s the underside of the wood base. Once the screw was threaded into it, we filled the remainder of the pilot hole
with wood putty, and it can be touched up with paint when the putty dries.
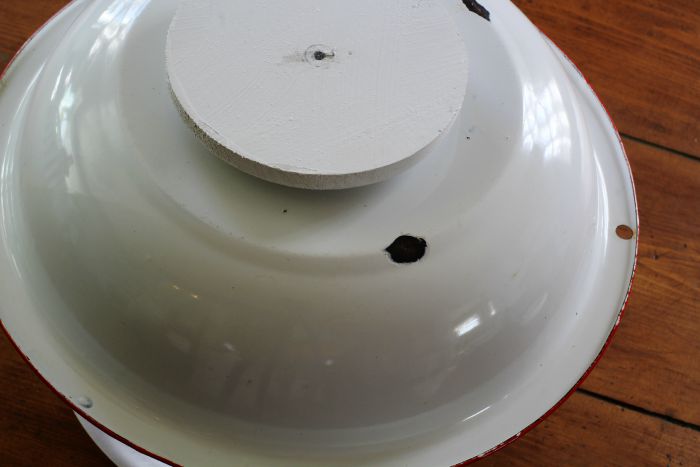
Here’s how it looks from the inside of the bowl.

Insert the chrome trim screw through the inside of the smaller bowl, then into the wood plaque, then into the pilot hole on the end of the spindle, and tighten it in place.

And voila!
Your tiered stand is done.
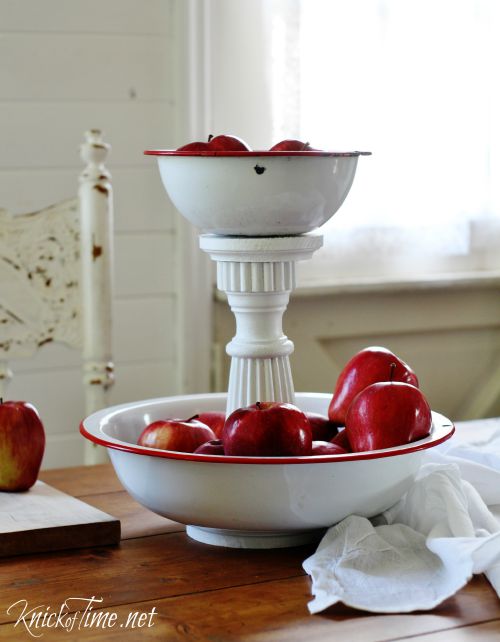
Now just fill it up!
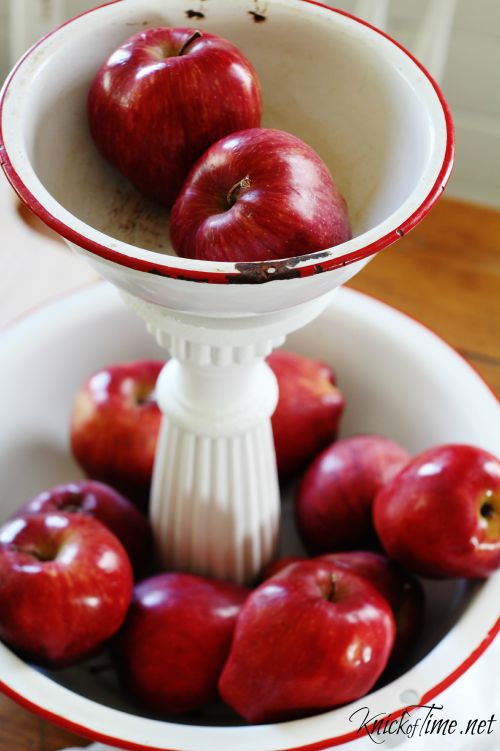
These can be used in any room of the house, and they help conserve on counter space.
You can see many more of my past tiered stands HERE. You’ll see there are so many different looks these can have.
If you don’t want to make your own, the one shown in this tutorial is available in my online shop HERE.


The enamelware bowls make such a cool tiered stand!
So pretty! I love enamelware and this is adorable!
Thank you for this tutorial. I tried to replicate the tiered stands with items that I had but never thought about using double ended threaded screws. I was using E6000 but I wasn’t having good success with it holding. You have great talent!
I have some cute enamel ware I can do this awesome tiered server! Thank you for sharing the tutorial dear Angie. I’m pinning.
Hugs,
FABBY
Great tutorial Thanks
It turned out awesome! Perfect colors too…you can use them everyday for a punch of happiness and for holidays!! Thank you for the wonderful tutorial 😉
It’s so lovely in white and red! Thank you so much for sharing your secret! I always thought glue just wasn’t enough to hold pieces together and now I know what to do! ;o)
Yay!!!! Thank You so much! I was just going to email you and ask you whats the best way to but together some vintage pie pans I found! you are awesome!
Your tiered stand is soooooooo lovely and very functional, too, but I’m not surprised one iota because you have a unique talent for such things! LOVE that red and what a great choice of spindle you made to join the bowls…it fits in perfectly! Thank you for taking the time and effort to create and share this tutorial with us!
Thank you so much for sharing! I drool over these when you post pictures and I have lots of enamelware bowls to try this with. Hopefully my husband will be willing to help me, once I find a spindle. Yea! So excited!
Good luck making your own, Kathy!
Hi Angie, great job making the ever-popular stand better! I’m thinking of making one using oblong cake pans! Heck, I could even use Dollar Tree ones and paint them. (Because I’m cheap, don’t you know?)
I did notice that the link at “how to find the center, here’s a great tutorial.” between the trim screw and plaque pictures isn’t hot.
Thanks for the inspiration! I’m over here from HomeTalk.
It’s just beautiful Angie and so perfectly farmhouse – I’m pinning it !
xxx
Helpful information. Lucky me I discovered your web site accidentally, and I am shocked why this coincidence did not took place
earlier! I bookmarked it.
Good day I am so delighted I found your webpage, I really found you by accident, while I was searching on Askjeeve for something else, Regardless I am here
now and would just like to say kudos for a marvelous post and a all round
thrilling blog (I also love the theme/design), I don’t
have time to go through it all at the minute but I have book-marked it
and also added your RSS feeds, so when I have time I will be back to read much more, Please
do keep up the great work.
Just want to say your article is as amazing.
The clarity on your publish is just nice and i can think you’re knowledgeable on this subject.
Fine along with your permission allow me to take hold of your
RSS feed to keep updated with forthcoming post. Thanks one million and please carry on the rewarding work.
I couldn’t resist commenting. Well written!
This is genius! I’ve been using E6000, which is okay, but this is so much better! Thank you for sharing!
I love it. Where can I find a smaller bowl
Etsy, thrift stores, and yard sales.