I love projects that have more than one way to use them, so I’m excited about my latest project, because it’s a reversible wall art project that has a chalkboard on one side, and a weathered wood look on the other.

To make it, you’ll need a wood frame. I picked mine up for a few dollars at a yard sale.

Cut a thin piece of MDF board, sized to fit inside the back of the frame opening.

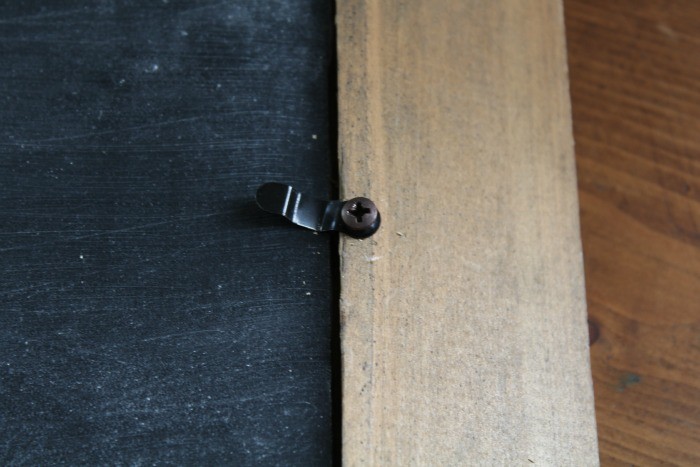
Framing clips added to the back of the frame make it easy to take the board out and flip it to display the art on either side side of the board.
Paint one side of the wood with chalkboard paint. Before using it, you’ll need to prime the surface by rubbing the side of a piece of chalk over the whole thing, then use a soft cloth to wipe it off. This keeps the chalk from making permanent marks on the chalkboard.

On the chalkboard side I used the Homemade Pie stencil (from my line of stencils) and colored the words in with a chalkboard pencil(Amazon link). I used the pencil,instead of regular chalk, because it makes less chalk dust, and is easier to trace around the letters. I used a cotton swab to soften the lines from the pencil. You could also use paint, if you want it to be permanent, and prime over it all with a piece of chalk, same as above, so it resembles a chalkboard.

Here it is in the frame.

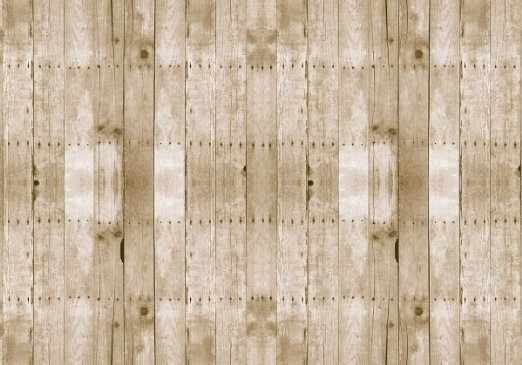
On the other side, I decoupaged Weathered Wood Paper (Amazon link) onto the board.You could also use wrapping paper. It just needs to be something large enough to cover the whole board. The weathered wood paper is inexpensive and realistic looking, so I used it.
Set it aside to dry, or hold a blow dryer on it, to speed up the drying time.

I’m not sure what type of screws these are, but they have a very short shank, and a blunt tip. I screwed it into the center of the board, to use as a hanger.

And here it is with one of my old platters hanging on it.

The lighting was different when I took the photo of the weathered wood side, so the frame looks darker, but it’s the same frame.You’d never guess by looking at either of them, that there’s a completely different display on the reverse side!

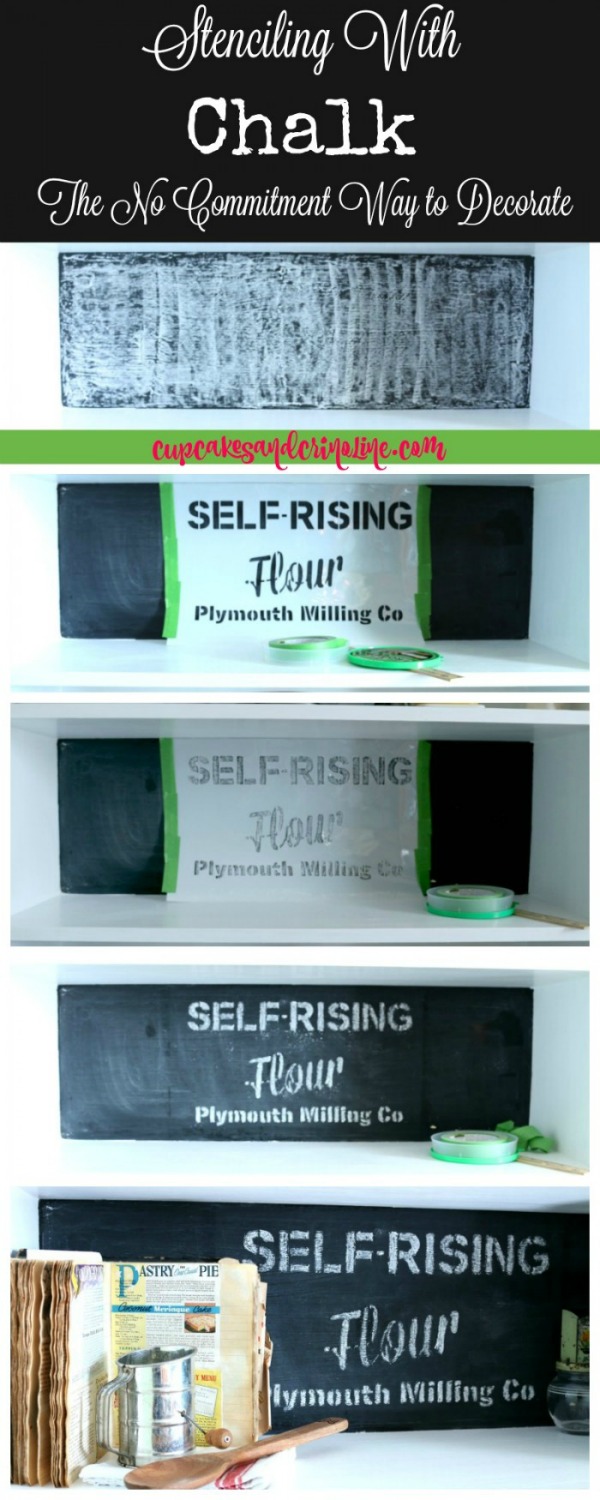
Mary Beth at Cupcakes & Crinoline, must have been reading my mind, because she also used one of my Vintage Sign Stencil designs for a chalkboard sign. She used the Flour Sack stencil for hers, and it turned out awesome! Be sure to pay her a visit and see how she did it!
This post contains Amazon links, for which I receive a small commission. For more information, see my Disclosure statement.


Great idea! Reversable art!
I never thought of using stencils with chalk before…great idea…I’m inspired! I love using both sides of a piece, too! Thanks for sharing, Angie!
Genious! I love this idea so much….I’ll be taking closer looks at all of my framed things from now on!
JP
Double the function and double the beauty! I also love the idea of stenciling with chalk…that way, you can have signs that suit your mood and decor any time you fancy!
This is brilliant dear, I’m looking all over my house and thinking have to do this on everything…LOL. Especially for the holidays! Thanks so much for the fabulous idea, Sandi
Love that weathered board paper and your idea of using the reverse side for another look is being real creative.
Where did you get the clips(and what do you call them) to keep the board in ? I’ve been trying to find something like that !! thanks
Darlene, my local craft stores don’t carry them, but they can be found on Amazon here – http://amzn.to/1RebUiF