I love white paint. It’s so crisp and clean looking and it’s my go-to color, but sometimes even white paint needs a friend to help it out. For today’s project, that friend is antiquing wax.

When it comes to my face and skin, the last thing I want to do is highlight my lines and wrinkles, but the opposite is true when I bring home finds from the thrift store.
They often look outdated or battered, but highlighting their “lines and wrinkles” with antiquing wax makes them look like they’ve aged gracefully, and aren’t completely worn out.
I’ve had a jar of antiquing wax stashed with a bunch of other paint supplies on my stair step pallet shelf for a long time, but to tell you the truth, I’ve been afraid to use it.
I’ve used antiquing products in the past and was frustrated that the paint ended up muddy looking after I applied it (see my review of that product HERE), but I was willing to give a different brand a chance this week.
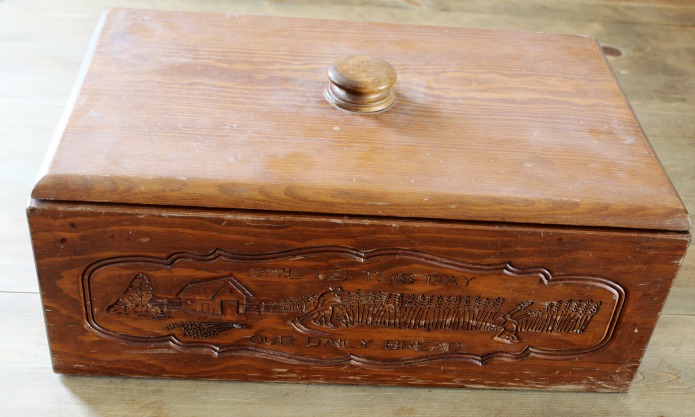
I picked up this vintage wooden bread box at a thrift store recently.
It is very sturdy, but it looked a bit battered from use and it was hard to read the words.
White paint has never failed me yet, so I painted the outside of the box and the lid. I didn’t paint the inside of the box.
While the white paint did cover up the really worn areas, it settled into the really tiny grooves of the words, which didn’t look good. Some of the other details didn’t stand out well either.

Using Antiquing Wax to Update Thrift Store Finds
So, I pulled out the Miss Mustard Seed wax (affiliate link) that I’ve been too afraid to try.
I figured I had nothing to lose.
Using antiquing wax was easy.
I used a small round stencil brush to work the wax into all the letters and crevices and held my breath hoping I didn’t just ruin the bread box.
I worked in small sections and used a flour sack towel to wipe away the excess and buff the finish.

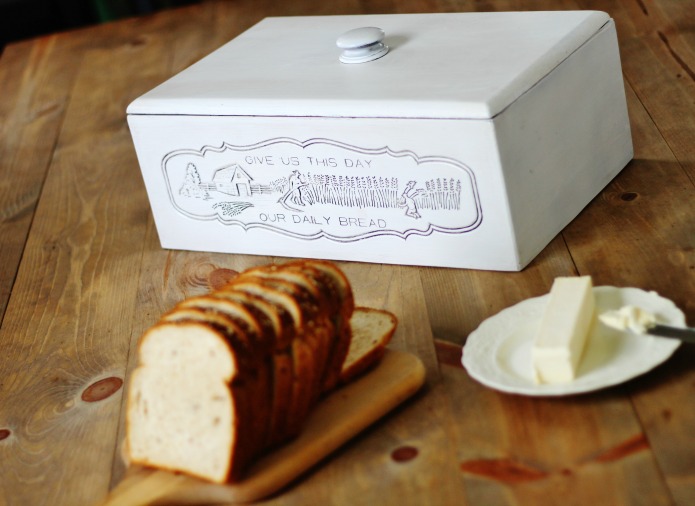
I was very please to see how the wax settled in the grooves and made it look naturally aged, but didn’t make the white paint look dirty.

The words can all be read clearly now and I love how fresh it looks.

It went from looking very worn and bland to fresh with vintage farmhouse style look.
If only I could find something that worked so well on my face! 🙂
PIN IT!

Vaya con Dios,

If you enjoyed this project, check out more Upcycled Decor HERE.


I have never used antiquing wax before, but I definitely need to try. It really made a nice difference with this box!
I’ll be using it mor often now, Randi. I had so much better results with it than with the other brand I’d tried.
Love it !
Thanks Sandy! 🙂
Wow! It looks very nice.
Thanks Nancy! It’s an awesome bread box, because it holds 2 whole loaves of bread.
Loved this, thanks for sharing.
Thanks Kimberley!
Ha, I love your title. For me, I’m going kicking and screaming to OLD. Grins, nice post, Sandi
I may go kicking and screaming, Sandi, but I think it’ll have to be crawling on my aching knees! 🙂
That did turn out nicely, Angie! Amazing how that little bit of wax made all the difference.
By the way, if you do find anything that works that well on fine lines and wrinkles, I hope you’ll share it with us!
The bread box looks great! Did you use the wax all over the bread box or just on the front part?
Tammie, I used it all over, because it does change the color of the paint just a bit,so I didn’t want the sides to look a different color.
That wax really made the box project spectacular.
If you ever feel you’ve used too much dark/antiquing wax, go over it soon after with clear wax and you can remove as much as you want. You have more control this way.
Good Job!! It came out so nice!!