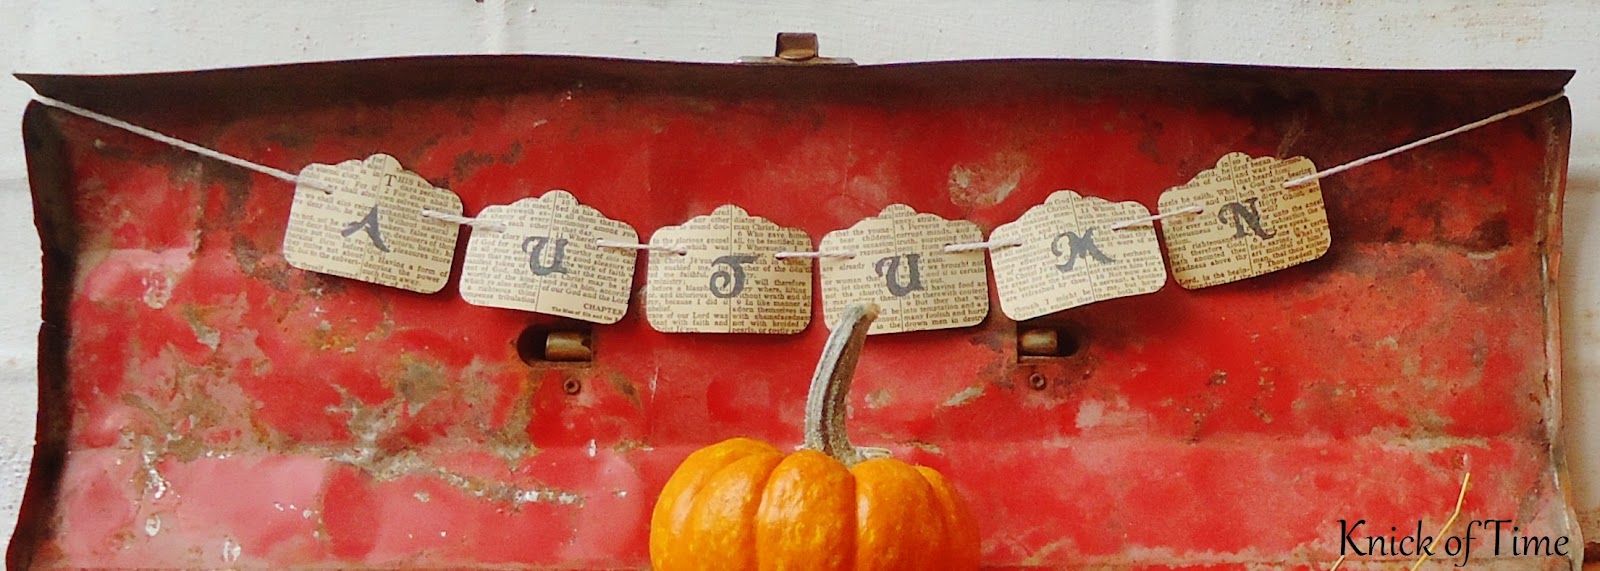
Last week, a customer purchased the old orange tool box that I showed you recently with the word “HOME” on the front of it, but she also wanted the word “AUTUMN” added. I didn’t have a stencil to match that word,so the fonts would have been to different. I suggested we go a different route instead and I created an itty bitty banner that she could hang from inside the lid, or any other little space she wanted.
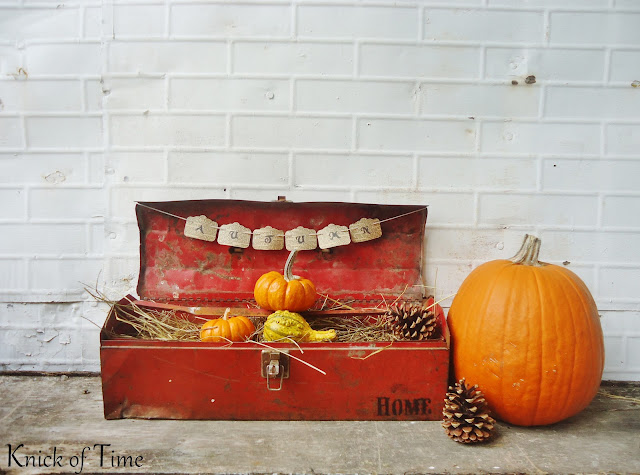
Using banners this small, you can create petite vignettes in lots of little spaces throughout your home and change them easily as the seasons change without a lot of fuss. You can whip them out pretty quickly as well.
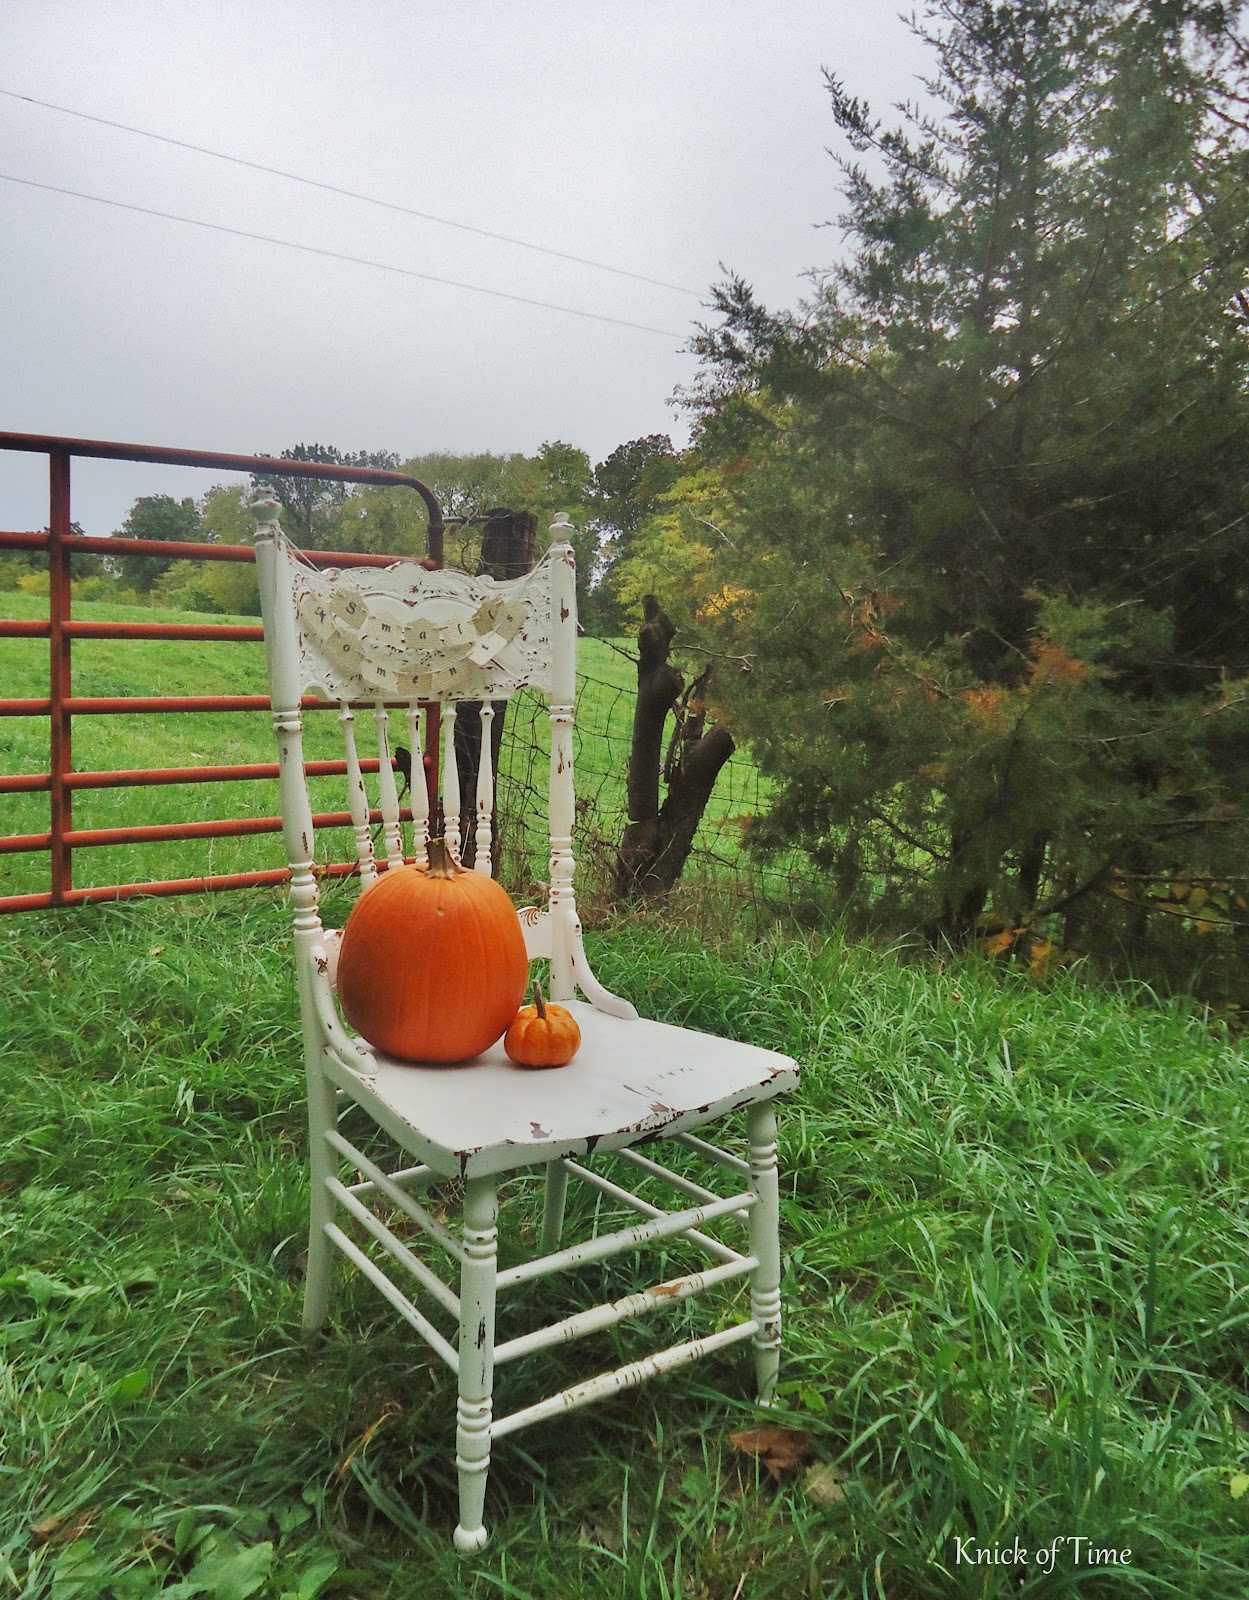
I have very few spaces inside my home for larger banners, but I can think of lots of little nooks
where a miniature banner like this would create a small “moment” within a vignette.
I used a shaped paper punch to cut out the pieces, but you could also just cut a triangle shape from cardstock to use as your template. Since these pieces were much smaller than normal banner pieces, I used a smaller hole punch for the twine to be strung through, but you could also just punch a hole with a needle with the twine already in the needle. If using really old paper, make sure to use hole reinforcements on the back so they don’t tear.
.jpg)
Generally, I use ink pads to make banners, but this time I just dabbed a rag in some paint and lightly tapped over the stencil to make the letters (dab some of the paint off on a paper plate, so there’s just a little on your rag).
.jpg)
Hope your day was filled with special, “small moments”.
.jpg)
Find more free printables and banners for Thanksgiving HERE.


Love the tool box. Love the chair among the grasses too.
Lovely blog. I love knowing that I have Christian blogging buddies.
So nice to share.
I found an old blue gas can and I don’t know what I want to do with it. Any ideas?
I love your mini banners!!
Love this idea! I’ve got a toy barn and a little log cabin that will be adorned with mini banners for upcoming holidays. Thanks for the idea!
such a cute idea, Angie. looks easy too!
Your tiny banners are as cute as can be. What a great idea – and thank you for going through the steps so clearly. Happy time.
Have a great weekend.
Joy
What a cute idea, I can think of a ton of uses for this!!! Thank you!
Carol
I love those little banners.
I’ve created a few crocheted banners but have yet to try printing anything out…for banners or to stencil. This looks super easy! I should give it a try!
Pat
Angie those banners are so sweet! Love how petite they are!
xx
Anne
I love it….so tiny…it looks great in the box….
These are just the sweetest little banners and so easy to make. Thanks for sharing Angie. I love the way it looks in the toolbox.
Is supper dupper cute:)
love the small banner idea!! never occurred to me…DUH !! that’s one of the many reasons i love your blog!! eye candy and brains!!
well so cute. you never cease to amaze me.
blessings
barb
Great idea Angie. I might have a go. I’ve never made a banner before. Love the new look to the blog too! 🙂
i love your mini banners! they are so cute and the size is just right! i loved that little box with the stenciling.
This is just perfect – it incorporates the things I love like banners, book pages and “tiny” things!
Okay, that little miniature banner is too cute! You always show us great ways to make small things into fun and interesting designs that pack a punch. I have so many tool boxes piling up (I can hardly resist them). I should try and make at least one of them a cute little showpiece like this. Thanks for the great idea.
Liz
What a clever idea is this mini banner, Angie–it looks beautiful strung against your chair! I also like that it’s an inexpensive and very flexible project that could be used in several different locations and ways–neat!
*squeals* Mini banners… how adorable!!!♥ Thank you, Angie, for sharing this wonderful idea!
xoxo
Great idea, and very pretty as well! 🙂
Angie, that is absolutely sweet!!! I’ve pinned it to use the idea. Such a sweet addition to any little vignette. Have a wonderful weekend.