I have a big empty space on my kitchen wall, just above our antique stove.
I don’t do empty spaces. I’ve never been a minimalist.
I haven’t left the space empty intentionally, but every time I make something and hang it there, then list it in my shop – it has sold quickly. It makes for great sales, but not for a pretty kitchen.
I didn’t want to spend much money, so I designed a farmhouse style rustic wooden frame chalkboard.
It’s an easy project that requires very basic woodworking skills, so anyone can make it.

Supplies needed
1 x 4 x 8″ furring strip (cost about $3)
3/16″ x 24″ x 24″ lauan plywood (cost about $4)
miter saw (or regular saw with miter box)
wood stain (we used this color)
white paint (we used leftover paint from our kitchen walls)
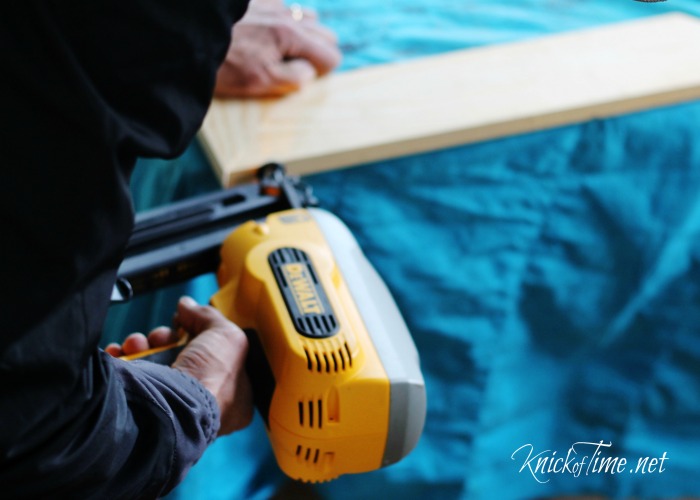
nail gun (we love this one)
sandpaper and sander
paintbrush & paint roller
Instructions
Step 1 – cut furring strip and lauan.
The overall size of my frame is 28″ x 21, so my wood cuts were:
2x – 28″ length
2x – 21″ wide
lauan – 24″ x 17″
We used a miter saw to miter the angles at the corners, but straight edges would work fine too. You could have them cut for you at most home improvement stores, and get the lauan cut at the same time, which would save you this step.
Step 2 – Nail or screw furring strip pieces together at the corners.
Step 3 – Stain the wood for the frame.
While the stain is drying, use a paint roller to apply chalkboard paint to the lauan plywood sheet, and set it aside to dry. I applied 2 coats to mine.
Step 4 – By the time I had finished painting with chalkboard paint, the stain was dry enough to paint the frame white. Allow paint to dry thoroughly.
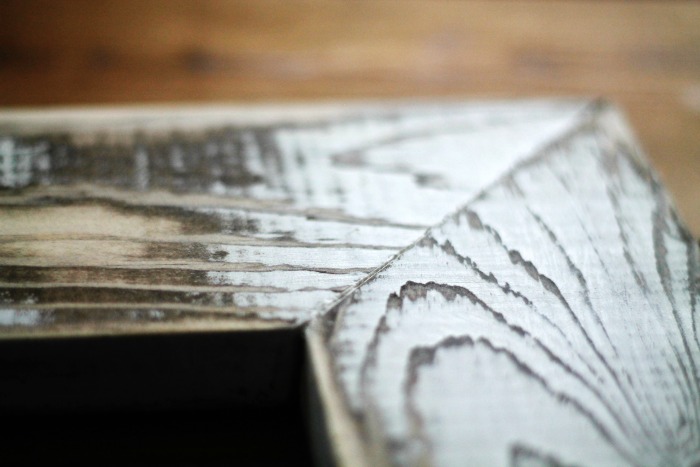
Step 5 – Sand the frame to distress it. I heavily distressed mine, but you could also do very minimal distressing if that’s your preference.
Step 6 – Drill pilot holes through the back of the chalkboard into the wood frame, then screw both pieces together.
DONE!

I am the WORST chalkboard artist, so I’ll probably never use mine as a chalkboard. Instead, I’m using it as a display for flowers. I used a staple gun to attach cotton twill tape to the back side, and hung an old lightning canning jar to hold the flowers.

This rustic wooden frame is the perfect style for my farmhouse kitchen and it gives me a great excuse to treat myself to fresh flowers every so often!
See more easy DIY Projects HERE.


So pretty, Angie- love it!
Thanks so much, Jeanette!
Looks gorgeous Angie. I love making my own frames. So much cheaper than buying. Love the aged effect. 🙂 Julie
Thanks a bunch, Julie!
That’s very pretty! I use to make my own frames out of old cedar fence pickets, but its been years since I made one. I love how you aged the piece.
Fresh Flowers can always cheer up a room.
Thanks Linda! I don’t splurge on fresh flowers very often, but now I have an excuse to do it!
I love it! I hope you list some of these in your shop exactly like this!
Sandy, I will be listing this one, since I plan to make more of them! 🙂
Not comparing anything sow like, just the sentiment is so true….. you could make a silk purse out of a sows ear!
LOL – now, I just need a sow’s ear to test your theory, Bliss! 🙂
Looks great! Like it with the vase! Too many written chalkboards! This is original! Like the ribbon touch! Have a great day! Cindy
So appreciate you providing detailed steps! I think I can do that. I have been wanting a board for a menus. I have even gone so far as to think I might paint the end of one of the mid century metal cabinets with chalkboard paint. I think this may work better.
Thanks Peggy! Let me know how yours turns out!
Oh, this is just sheer loveliness…I soooooo want to do this! I’d have to have my materials cut to size for me, but I might be able to manage putting those pieces together, staining and painting them. I just love the aged affect on your frame and I also love how you styled it with flowers…that’s very unique and I’d like to steal that idea from you, if you don’t mind. 🙂
Have fun making yours! It’s easy – especially since you can get the wood cut in my home improvement stores for free.
Angie, I loved hearing you say you “don’t do empty spaces.” I am the same way! I always say that if there’s an empty wall space or a clear counter top, I will find something to fill it. It’s not always the most esthetically pleasing thing, but something will be magnetized to that space! I’ve always tho’t this characteristic of mine to fill every empty space was a liability, but after reading your blog today I think I am in very good company!
By the way, the distressed frame (I would have sworn that it was reclaimed barn-wood) and flower display is very attractive. Instead of the blackboard paint it might look cool with a piece of burlap or linen fastened to the back. I might have to try that.
I really am trying to easy up on filling empty spaces, and decrease the overall clutter in my home, but empty spaces just beckon to me, Naomi!
Love it Angie … another really nice project. Thanks for the tutorial on how to get that look on the frame.
Thanks Audrey!!
This is beautiful!
Thanks so much, Kelly!
This project is definitely a keeper. Thank you for putting your materials list and step-by-step instructions (this is always a bonus). I really like the rustic, distressed look of wood and you really captured it here. I hope this is the right fit to fill your space.
Beautiful project, Angie! I love the nice size, too! Wanted to tell you…I didn’t enter your giveaway as I don’t have a cat, but I LOVED your video! You did a wonderful job with it and had me laughing!
This is lovely! I found you on the Weekend Retreat Linky.
Thanks
Angie
PS – I also wanted to invite you to hop on board the Great Blog Train (blog hop) – we are traveling to Columbus Ohio this month!
http://www.godsgrowinggarden.com/2015/03/the-great-blog-train-27-giveaway.html
Hi,
This is a beautiful piece & I have a perfect spot in my house for it so I am going to attempt to re-create it. My only question is how & what did you use to attach the jar??
Thanks for posting !
Connie, the jar is just hanging from the twill tape that I stapled to the back of the frame.
This looks very nice! I may try to make one although I am not very handy(hubby could help!!) Thanks!
REALLY love this piece, Angie! It’s so perfect for changing out all summer. I’d love to have enough wall space to do this! Featured this weekend on Party Junk!
Thanks Donna!
I love this Angie and I’m already anxious to make a version of this….pinning to remember!
JP
Wow I love how this looks so country cottage… I’m hoping if I make this it will encourage my boyfriend to start buying me some flowers more often!! xx Ari xx
LOL I hope he does, Ariana!
Hello!
Thanks for sharing this great idea!! I hope you don’t mind if I try something similar for my kitchen!!
Thanks!!
Jan
Ricketypickets.com
My pleasure, Jan. Good luck making your own!
I love this – it is just what I need in my dining room! 🙂
It is perfect for me, since we really only have basic – and I mean BASIC tools…I can have the wood cut for me and hammer away. Thanks, Angie!
Your ideas always impress me. Thanks so much for sharing this great idea!!
So pretty! Visiting from Style Showcase, and pinned to my DIY board!
Oh my goodness, how Iuv this project. I luv chalkboards and use them all the time. I would luv for you to share it with us at Wall to Wall DIY Wednesday Link Up!
Really pretty decor project. I love the finished design. The frame is looks vintage. Happy Summer, Kippi
Happy Fall! I just wanted to quickly reach out as we’re putting together the DIY farmhouse style story over at City Girl Gone Mom that will feature some of our favorite designs from our favorite bloggers! We loved your post and would like permission to feature your photo and design in the story. It would consist of a photo of your design, a blurb about it and a link back to your website.
Let me know what you think! We’d love to have you on board!
Thanks!
Sure but just one photo and not any directions to make it. Send me the link once it posted.