Do you remember when I wanted a barn quilt, but I soaked in my bathtub while my son drew all the painting lines for me?
And do you remember the time I had to patch 100 screw holes in my kitchen because I had drilled so many screws into the walls?
Both of those stories illustrate something I’m embarrassed to admit …
I can be kind of lazy.
But sometimes laziness pays off when I figure out an easier way to do things because of it.
I wanted to make some indoor quilt blocks to hang in my kitchen.
My son is away at college now, so I couldn’t have him figure out all those tricky lines for me.
I decided to get smart and design stencils that would make the job so much easier and faster.
No measuring and taping off lines or pulling my hair out over geometry angles.
And here’s how I did it …

How to make your own Farmhouse Quilt Block Signs – the EASY way!
Supplies Needed (affiliate links included for the products I used):
Quilt Block Stencils (links to purchase at the end)
12″ wide board (at least 36″ long for all three quilt signs)
stencil foam roller or stencil brush
Chalk Finish Paint in desired color
paper towels
1. Cut a 12″ wide board into 12″ lengths for each quilt sign (12″x 12″ each).
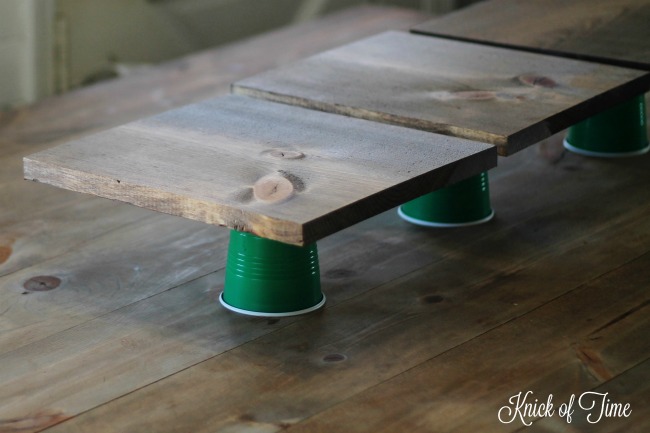
2. Paint or stain each block and let dry.
3. Position quilt block stencil in the center of wood block and tape in place.
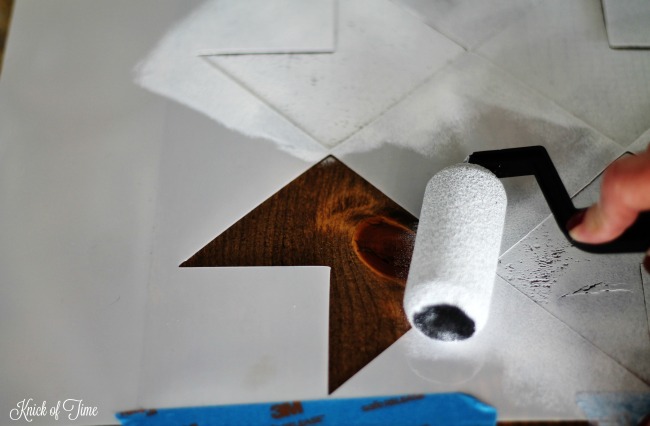
4. Put paint on your stencil brush or roller, then offload most of the paint onto paper towels.
5. With a very dry brush or roller, paint over the stencil on the wood block and let dry.
6. Attach Command Strips and you’re DONE!
If you only plan to make one quilt block, cut your wood into 12″ x 12″squares. To make all three quilt blocks, you’ll need a board that is at least 36″ long, but I bought a 6-foot board so I could make an extra block. I knew I’d use the excess wood for another project. I asked the man at the home improvement store to cut the three 12″ square blocks for me, since it’s a free service.

I use disposable cups to elevate painted or stained wood while it dries so none gets on my work surface.
Because I’m lazy and hate measuring, I just “eyeballed” getting the stencil centered on the wood blocks, then used painter’s tape to keep them in place. If you’re more of a perfectionist that I am, you may want to measure to make sure it’s centered.

Normally I use stencil brushes, but I opted to use a roller this time. After adding paint to the roller, I just rolled most of it off onto a paper towel so it wouldn’t bleed under the stencils.
It worked like a charm!

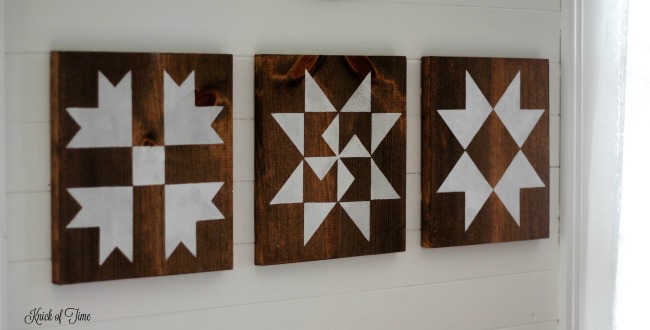
Here they are all finished.

And here they are up close.
The Martha Washington block.

The Bear Paw block.

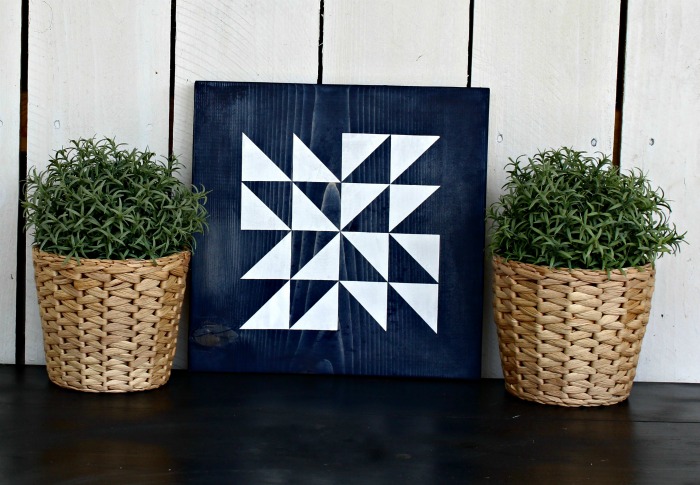
And the Ohio Star block.

I used red and white paint on this block. So you can see they can be made with any combination of paint colors, instead of staining the wood.
Just paint a base color and choose a coordinating color to paint over the stencil.

This one is available in my Etsy shop HERE.

And this one is available HERE.

And this blue and white one is available HERE.
I removed the sign I made for Thanksgiving and hung these in its place.
Without making a single screw hole in the wall!
I may be lazy, but at least I finally got smart. 🙂

These are fast and easy to finish and would make inexpensive gifts too.
SAVE $10 – Purchase all 3 quilt stencils HERE.
Purchase Martha Washington quilt block stencil HERE.
Purchase Bear Paw quilt block stencil HERE.
Purchase Ohio Star quilt block stencil HERE.
See all Vintage Sign Stencil projects HERE.
See the entire collection of Vintage Sign Stencils HERE.

Vaya con Dios,


These are beautiful, Angie! Lovely patterns!
Thanks so much, Linda – I love changing things up in my kitchen, and these are just right for the space under my display shelf.
Love how these turned out! Such a great idea and make beautiful wall art!
Thanks Sam!
Oh man! I love these! I have to add this to my “projects to do” list. 😀
Your wall art looks so nice!
You may have a post on it already, but I would love to know how you did the white shelf with the ironwork! It is fabulous!!
Lin, here’s my posts about my farmhouse wall shelves – https://knickoftime.net/2017/01/white-kitchen-wall-storage-shelves.html
I have them throughout my kitchen on various walls and love them!
These are so neat! My mom quilts, so these instantly reminded me of her. Thanks for linking up with Merry Monday.
Your quilt blocks are awesome, Angie! I just love how they turned out.
Thanks Diana!
I LOVE these! What a great idea. I’m way more comfortable working with wood and paint than I am sewing, so this would make an awesome project for me. Thanks for sharing:)
Sara, same here – My sewing machine and I don’t see eye to eye, but I get along great with wood! 🙂
These are awesome, Angie! Pinned ☺
Those are great. I miss my Ohio Barns with all the beautiful designs. Will have to find a place to put these soon!
Thanks so much, Stephanie!
That’s about the only kind of quilting I would do! Thanks for sharing!
They turned out gorgeous!!!
Thanks so much, Tracy!
This is really pretty, simple and looks easy. Love it! Pinning and sharing.
Thanks so much, Patti!
So pretty! very creative and has so many possibilities. I can be done on tables and all,
Maria
Thanks Maria. I’ve used the stencils on pillows, but tables didn’t even occur to me – that’s a great idea!
Your quilt block plaques is something really want to make. Will have to wait til we get paid (another 5 week month on SS), pay all my bills to see if will have any money left to buy stencils. Not the fun part of being on SS but life is what it is, doggone it. Your stencils are just what I love using, lots of perfect topics.
Enjoy rest of week. Have always loved your blog since I discovered blogs.
Thanks so much, Jane Ellen! Have fun making your own!
Says link is not available and I would really like to order the stencils
Angie,
Your blocks are amazing and inspired me to do some too. However, I drew out the patterns on the boards. First I stained them then, then taped the edges and painted the middle white. When dry, I drew a grid on the white paint and used black and grey to paint the pattern.
I wish I knew how to link, I’d put up pics of my barn quilts.
Linda
How did I miss this!? Pinned! I can think of a bunch of people who would love these.
Thank you so much for sharing.
What did you put on the back for hanging on the wall?
Thanks again.
You mentioned a sealer at the beginning of the article but I didnt see it in the instructions. Is this required?
No, unless they will be outside Helga.
Ok. Thanks. I made a few and LOVE how they turned out! 🙂