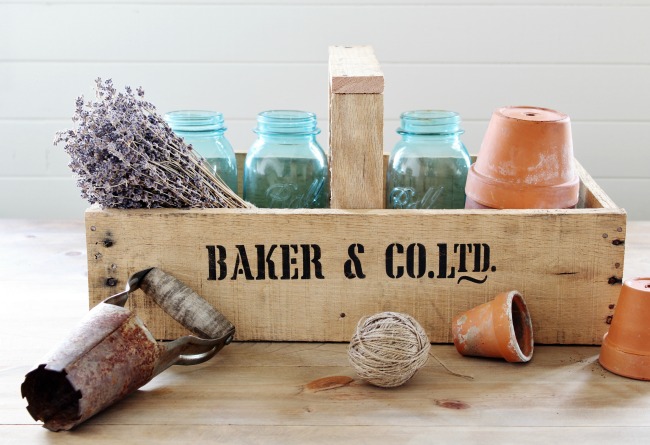
My husband recently restocked our supply of pallets, and I knew exactly what I wanted to make with one of them – a rustic handled wooden crate!
It could be used as a table centerpiece or on a mantle, but I plan to use it on our coffee table to hold decor and remote controls.
I took step-by-step photos, so you can make one too.
How to Make a Rustic Handled Wooden Crate
Supplies used:
(contains some Amazon affiliate links)
Pallet or other reclaimed wood
Stencil – I used Baker & Co. Old Crate stencil.
Stencil brushes
Painter’s tape
Paint

Building the crate:
1. Cut pallet apart.
Use a reciprocating saw with a demolition blade to cut apart a pallet. This leaves the nails intact in the wood, which I love.
TIP – It’s important to use a blade that has a lot of teeth per inch (at least 10) when you are cutting through metal so that the blade doesn’t get hung up.

2. Cut wood to size.
Determine the size you want your crate to be and cut planks to size.
We used two boards for the front and back, two for the sides, and three for the bottom.
For the handle, we used three more pieces cut to size (handle pieces not shown in photo).
3. Nail the front, back, and side pieces together to form the frame of the crate.
You can use any nails that are the right length, but I have a jar full of rusty old nails that I picked up at a flea market.
Since I wanted the handled crate to looked old and weathered, they were perfect.
My husband used wire cutters to clip them to the correct length.

I recommend you drill pilot holes so the wood doesn’t split when you nail the pieces together.
4. Build the bottom of the crate.
Drill pilot holes and nail from the sides of the crate.
5. Attach handle pieces.
Attach the upright pieces of the handle inside the crate, then nail the top of the handle onto them.
6. Add stenciled design if desired.
Position the stencil on the crate and secure it with painter’s tape. Using a very dry brush, paint the image onto the crate.
You could also stain the wood if you desire a darker finish, but I left the wood natural.
*Note to self – don’t water plants right before putting them in the crate. 🙂
This was a totally free project, since the pallets were free.
Don’t you just love a free farmhouse project!

I’d love to hear what you think of my farmhouse handled wooden crate in the comments below, or on Facebook or Instagram. I appreciate it when you PIN IT on Pinterest too! 🙂
If you enjoyed today’s post, you can see more of my crate projects below.
Click on any image to be taken to that post.
On another note, I’ve been wanting to try Mrs. Meyer’s products for a long time and finally ordered quite a few since I found some good deals that were less expensive than I’ve seen locally.

Mrs. Meyer’s products are all earth-friendly and come in amazing scents like lavender, lemon verbena, and honeysuckle.
I ordered products for the kitchen, cleaning, and personal care, but there were lots more to choose from.
I can’t wait to try everything, and I’ll share my thoughts about what I bought once I receive my order.
If you’d like to try Mrs. Meyers products too, you can get $10 free when you sign up to receive emails HERE.
This isn’t a sponsored post for Mrs. Meyer’s and I wasn’t given any of the products I ordered, but I am participating in their “refer a friend” program.


Suxh a great looking project, Angie! Pinning! Thanks for sharing the product promotion…I am trying them!
could you give me exact measurements of the boards that you cut?
Sharon, you really can cut the boards whatever size you want, depending on how large your want your handled crate to be. The front and back pieces of mine are 20-1/2″ and the sides are 10-1/2″. Hope that helps!
great projects with wooden crates, I never see these ideas before