Chalk Couture Explore More DIY Enamel Mugs
I don’t get giddy very often, but today’s project makes me SO happy!
From the moment I became a designer with Chalk Couture, I knew I wanted to make these DIY mugs for my adult kids.
All of them are outdoors people, so I knew they would love these.
I’ll be visiting my middle son and his wife soon and I’m planning to give them two of these mugs.
I can’t wait to see their reaction to them!


Join my VIP Facebook group for sales and special offers HERE.

I made a quick video showing how I made them. The photos, directions, and supply list are also below.
Here’s what you’ll need to make a set of your own (affiliate links included to help you find the products you’ll need):
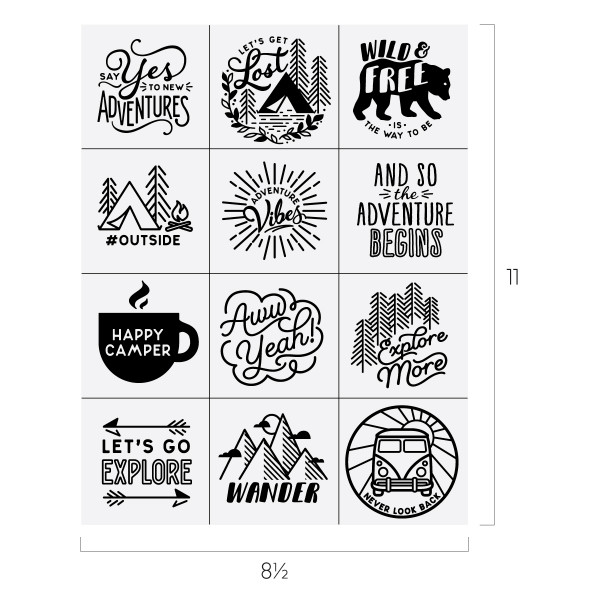
- Mini Transfers (Create your own with Ikonart Stencil Maker Use code KNICK OF TIME FOR 15% off!
- White Enamel Mugs
-
- Small squeegee
- Stir sticks
- Oven or toaster oven
- Heat tool (optional) or blow dryer
Directions to make mugs:
- Create a transfer following directions in the kit.
- *Remember to pull it off side to side and not diagonally so the transfer doesn’t stretch.
- “Fuzz” the transfer on a microfiber towel several times so the transfer won’t become permanently stuck on the mug.
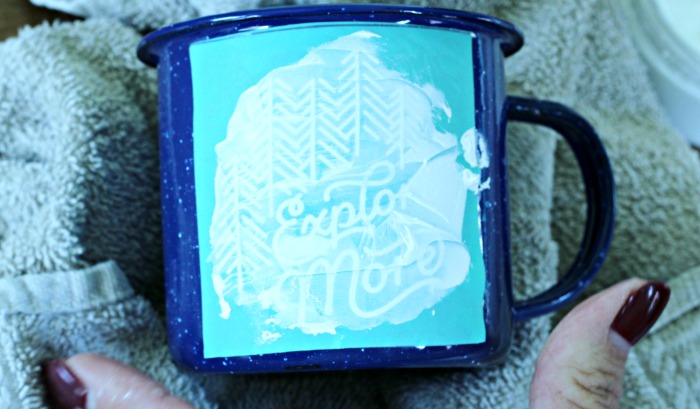
- Decide whether you want the design to face you or be on the back of the mug and position it, smoothing out all the bubbles in the design area.
- Tip – Leave the edges of the transfer not pressed down so it will be easier to remove it once you are done.
- Apply Couture ink with the small squeegee or stir stick. I find it easier to cut the squeegee in half or quarters to work on small areas.
- Drag the squeegee across the transfer. Make sure the entire design is covered, then remove the excess ink and put it back in the original pot.
- Remove the transfer carefully from the mug, again pulling side to side and not diagonally.
- If you got any ink on your fingers, clean them before you handle the mug.
- Use a heat gun to dry inked design to the touch.
- Place in a cold oven and set it at 350 degrees for 30 minutes. Allow the mug to cool in the oven after the timer goes off.
That’s it!

![]()
![]()

If you get any ink on the mug, wipe it off with a damp cloth before the ink dries.
Isn’t that adorable!


These Chalk Couture Explore More mugs are so fun to make and look amazing!
My youngest son wanted one of his own. He chose the Wander design and made it by himself.

If I would have had 12 mugs I would have made all 12 designs. I love them that much! I have placed another order, so I definitely will be making more.
Here’s each design that we made on the mugs close up.


Do you know someone who would love a set of Explore More mugs?

To discover more of my projects made with Chalk Couture, click HERE.
Would you like to earn FREE Chalk Couture products?
Here’s How:
Host an online party with me and get 10% of the total sales in free product credit, PLUS I’ll send you an additional free transfer as a Thank-You!
You don’t need to clean your house and can be a hostess in your PJ’s!
It couldn’t be easier. Simply invite your family and friends on Facebook or by email.
Leave a comment below and I’ll contact you and help you plan it.

Have questions??
Leave a comment below and I’ll answer them!
Vaya con Dios,


I love this stuff Angie and you did a great job on these little mugs!!! I have to try the ink next!!
You’ll love the ink Susan!
These mugs are so cute & those chalk couture decals are amazing. I will be featuring this at Merry Monday in my Get Crafty post. See you at the party.
I made some similar, but found that the ink does still scrape off (with some effort) after baking & cooling. Any tips to help make these last? Thanks!
Don’t use a scrubber on them. I only use a dish cloth on the outside Kirsten.
Hi Angie, where did you purchase the enamel mugs? I am a Chalk Couture designer and would love to make these for my daughter and her family.
Here’s the link – https://amzn.to/2CBZFhF
Hello, can you tell me how long you heat set them with the heat gun? I know the time and temp for oven setting but we are looking at setting on a coffee cup with a plastic rim bottom
Just until dry and not tacky.
The heat won’t work to set them. They have to go in the oven.
Where can I buy transfers like these? Also does a stencil work the same way as transfers?
A stencil does not work the same, Amy. I have one available you can buy.
Do you still have the Explore More Transfers for sale? We are avid RVers and I would love to make some of these!!
I emailed you.
I’m not sure when this post is from, but do you have any explore more transfers available? Thank you!
Sorry, no