For the last several years at our church’s VBS day camp, I’ve taught a Bible skills class, but I wanted to teach something different this year. We offer the older kids their choice of several project classes, like woodworking, sewing & cooking, and I’m not a pro at any of those things, but I do know junk, so my class is called, “Junk Art”.
I’ll be showing them how to make 4 projects during the 5-day camp. My goal is to show the kids new ways to use things like nails, wood scraps, empty glass bottles and old book pages, and share some skills I frequently use, like image transfer & decoupage, as well as my favorite crafting hobby – repurposing.
I am not a fan of crafts involving paper plates, toilet paper tubes, etc., because they look like projects that are intended to get thrown away. I’d rather help the kids make something that I hope they’ll enjoy as a keepsake from camp, so I choose projects that I think they’ll be proud of when finished, and their moms will be happy to display, (and not sneak into the trash when they think the kids won’t notice.) I’m still working on a few of my project samples, but I thought I’d share 2 of them that I’ve finished. My husband is in the process of building a deck for our above-ground pool, and there were lots of left-over lumber scraps I could use, so both of these projects involve using up those scraps.
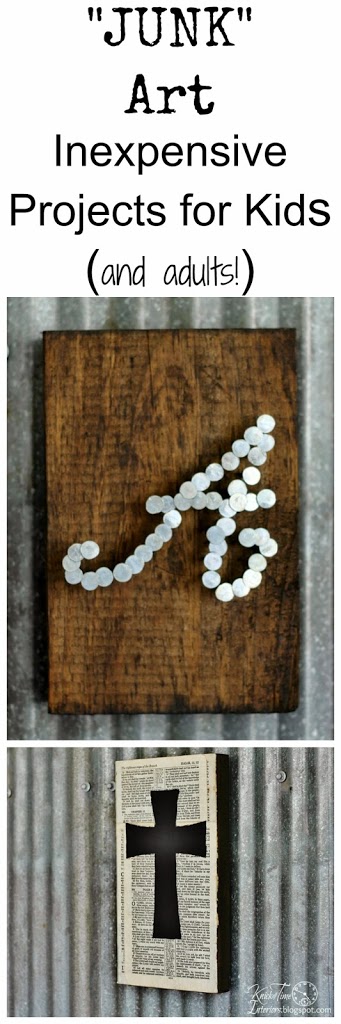
I’ve been wanting to make myself some “nail art” for quite a while, and this was my chance to do it!

Any font could be used for the letter, but I used a letter from my 1800’s alphabet graphic. I used Picmonkey to “cut” the letter “A” away from the rest of the image, then enlarged and printed it.
I taped the pattern on the wood piece (which I stained first), then hammered 1-1/2″ galvanized roofing nails into it. When I had all the nails hammered in, I tore the paper away. Some tiny bits of paper got stuck around a few of the nails, which I picked off. When the kids make their projects, I’ll have them use tracing paper to trace the letter onto the wood, instead of hammering through the paper. This way, they won’t need to worry about tearing the paper away afterward. Once the nails are all in place, a light line won’t show up.

My other project is a decoupage/painted cross.

The supply list is very basic – wood scrap, book pages (I used pages from a damaged Bible), a cross stencil (I got mine at Hobby Lobby), paint, glue and a foam brush.

I painted the sides of the wood first, then mixed some glue with a little water, and used it to decoupage the Bible pages onto the wood. Single pages didn’t cover the whole block, so I overlapped the pages.

Kids like colorful paints, which I’ll bring to class, but I just wanted black paint for my cross image. I used painters tape to hold the stencil in place, while I gently “pounced” the foam brush over the stencil. I use a very small amount of paint on the brush, so it won’t bleed under the stencil. On the back, I inserted 2 screws – one on each side at the top, with some wire wound around them, to use as a hanger.

I’ll be finishing up my other 2 projects this week, and I’ll try to share them next week.
{PIN this image for reference later}
Angie


Oooo! I like both! the monogram is cool.
That Cross– I need one for my collection!
Interesting projects for the kids. I think the kids will enjoy doing both ‘junk art’ pieces. The Mom’s should be proud of either of them. You will have fun too.
Blessings,
Audrey Z. @ Timeless Treasures
Angie – I’ve been the craft director for MANY years at VBS —- I Love the cross, and from experience I have used old t-shirt material to make the “pouncers” — cut about a 6″ square and keep wadding it up until you have a neat little pad. i tie off with twine. I’ve also used stamp pads instead of paint. I hope it’s okay if I use your ideas at my church?
Love both of these ideas and I know the kids and parents will too!
When my kids were young, I did crafts at Bible School too. These are great ideas.