I’m a die-hard bathtub soaker, and always have been. If I had to guess, I’d say that at least 75% of my blog posts have been written while soaking in my bathtub. It’s the one place in the house where I don’t get distracted by people, the tv, or the phone, so I can concentrate, and relax at the same time.
A bathtub table is a must for me, and I’ve had several of them over the years. Both were made my one of my sons as Christmas gifts. One had a mosiac tile top, but eventually some of the tiles got knocked out. It was beautiful, but quite heavy. It The other I’ve been using for the last 3 years, but the underside wasn’t sealed, so the wood has started rotting from touching water. It was time to retire it and make a new one.
Supplies:( affiliate links included)
This was a super easy project, requiring just a few supplies and tools, including:
pallet wood & scrap wood (I used leftover furring strips)
(*If you don’t have pallet wood, purchase a new pine board, and have it cut to correct lengths at the home improvement store – they’ll usually do it for free.)
screws (measure the thickness of the pallet wood and furring strips, and select screws just slightly shorter)
wood stain ( I used Minwax Early American color)
wood sealer (I used Fusion Tough Coat)
*other – saw, screwdriver and sandpaper, safety googles.
Directions:
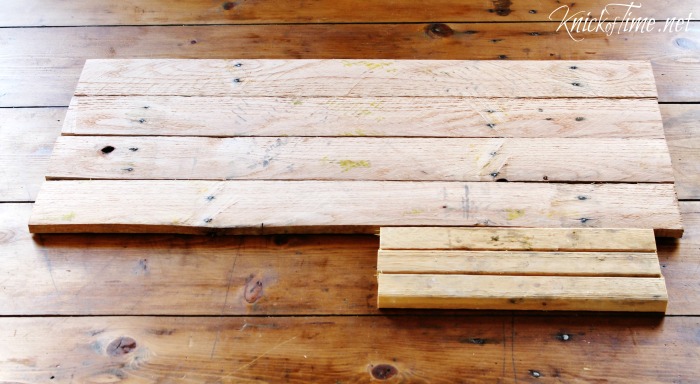
Wood Cuts -First, you need to measure the width of your bathtub to determine how long you’ll need your pallet pieces to be. I wanted my table to overhang the side of my tub just a bit, so I cut my pieces 29″ long.
My pallet pieces were about 3″ wide, and I used 4 of them, so my table would be about 12″ wide.
I also cut 3 pieces of wood furring strips 11″ long.
Connect – Flip over the pallet pieces and attach the furring strips to the underside. I put a furring strip on each end, and one in the center. To determine where to place the furring strips, lay all the pallet pieces across your bathtub (underside facing up), and make small pencil marks. You want the furring strips to be attached just a small distance from where the inside of your tub is, so your table can’t get bumped off.
Pallet wood is rarely very straight, so when you screw the furring strip onto each piece, just pull them as close together as you can.
You can see the sawed off ends of the nails that originally connected each piece to the pallet. I always try to leave the nails in the wood, because I love the way they look. Just make sure there aren’t any sharp pieces protruding that you could cut your legs on.
Sand & Stain – Once you have all the pallet pieces connected, you may want to sand the top well, because pallet wood is rough. I opted not to sand mine, because I wanted it to be rustic, but I did check to make sure it was smooth enough that I wouldn’t get splinters.
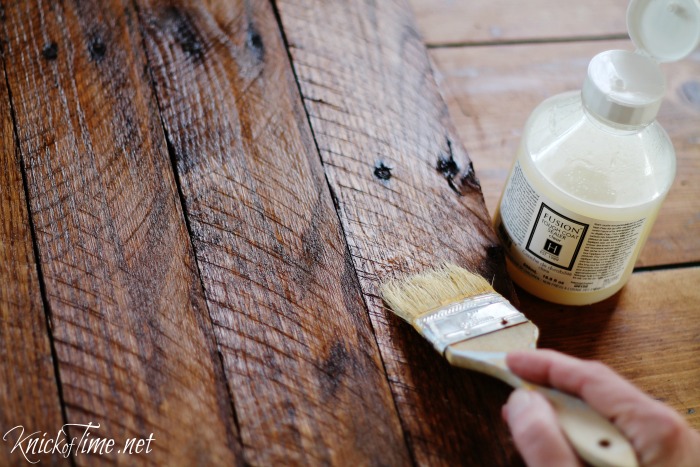
I used a chip brush to apply the wood stain, then wiped up any excess stain with a junk cloth.
Seal – You don’t want to skip this important step, because your table will likely get wet and will always be exposed to moisture. I used Tough Coat to seal my bathtub table, so it would have extra protection against water damage. You’ll want to apply at least 2 coats, allowing it to dry between coats.
It looks gorgeously rustic in my bathroom, and I wrote today’s post with my computer on it – I love it!
The best part is, I had everything I needed on hand, so it didn’t cost me a cent to make.
See more easy DIY projects HERE.


Pinned it, and a soak sounds good.
You know, I’ve never thought about having a bath table, but now I see this one, it sounds like an amazing idea! I have never been one to take my phone or laptop or even a book into the tub because I am a terrible butterfingers…but a sweet, little table like this would remedy that! And I’ve got a lot of old wood fencing here that was left from the last owners of the house, so I could probably use that. Thank you for another beautiful and functional idea!
Oh I am so jealous. We have such a tiny tub in our home now that I cannot get up and down in it. I LOVE a bath…..Adore a bath. I do my best praying in the tub….so I miss it. But I love the pallet idea…just for the look of it too!!
ISuch a clever idea! And I love the Fusion Tough Coat! It’s a fantastic product
I’m a soaker too! This is getting added to my things to do in my spare time list (at the top)….
side note: I am 6’3″ tall and my ‘spare time to do list’ is taller than I!!!
I think we’re on the same wave length. I’ve been meaning to put one of these together for a while now. Sometimes you spur me on. Hopefully this will be another time.
Looks like the perfect tub table Angie. If I had that, I might never get out of the tub! Thanks for sharing on Shabbilicious Friday.
Hugs – Kerryanne
Thank you Angie for this wonderful inspiration! We are redoing our guest bathroom later on this year and we are putting in the claw foot tub, this would be perfect for it since I plan to use the tub for myself whenever a relaxing bath urge hits…unfortunately our master bath only has a stand up shower 🙁 and I don’t have additional square footage for a tub in there so I opted to add it to the guest bath. Have a wonderful day! Thank you for sharing all your wonderful projects with us!
It’s such an easy project, Lourdes – you will love it! Someday, I hope to have a claw foot tub…it’s on my dream list!