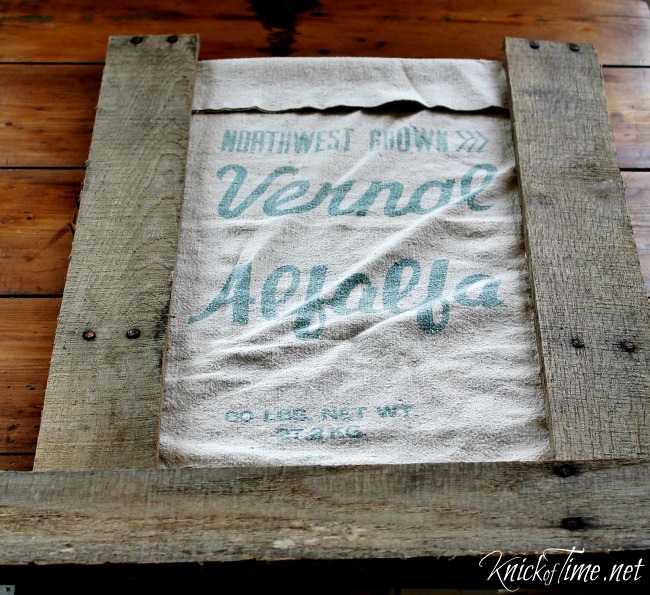
Do you remember that big blank space I had over my antique kitchen stove… that space I filled with a rustic framed chalkboard? Well, I did it again – I sold the chalkboard and ended up with a big blank space once again. It wasn’t any big deal though, and I planned to make another one of those chalkboards, but then I found this old feed bag that I’ve had for several years. Instead of making a frame for a chalkboard, I decided to make a similar frame for the feed bag instead – this time using pallet wood, and leaving the frame rustic and unpainted.
I laid out the seed bag and placed the pallet wood around it, so I could determine the lengths I would need to cut the wood. Your cut lengths will vary, depending on the size of your feed bag, but for mine, the cut lengths were:
2 x 29″
2 x 18″
2x 11″
Once the pieces were cut, the long pieces for the two sides were screwed onto the 2 shorter (18″) pieces for the top and bottom. If you have a preferred side of the wood that you want to be on the front, make sure to add your screws from the back, so they don’t show. I used a carpenter triangle to make sure all the pieces were straight.
Flipping it over and attaching the wood together at the top of the frame, (it’s upside down in this photo), I let the two long ends stick out a bit from

Because the shorter pieces of wood were overlapping the longer pieces, that left a gap and the feed back wouldn’t have been flush against the wood, which is why I also added two 11″ pieces. They were screwed into the back of the 18″ pieces. I hope that’s clearer than mud, and it really is easy, but that’s why I’ve included lots of photos so you can visualize it.
Here it is assembled. From the front, you can only see the 18″ shorter pieces, and the 11″ ones fit directly behind them, between the side pieces.
To attach the feed bag, I used steel upholstery tacks. Should I decide to take the feed bag out of the frame, these are easy to remove. I only hammered them halfway in first, then flipped it around to make sure everything was straight from the front, then drove them in the rest of the way.
My big blank space on the wall is filled once again!
One other thing – I did not want to cut any fabric off of my bag and I didn’t want the frame to be too long, so I just folded the top edge down before attaching it in the frame. I think it looks like a cuff on the bag this way.
See more of my Pallet Wood projects HERE.


The feed sack is very pretty and looks great in your pallet wood frame, Angie!
And the color goes so beautiful in your kitchen!
Love the colour and the font-type on that feed bag…it really deserved to be framed beautifully like you have done so that it can be showcased properly! Your kitchen will sing with this new addition!
Love the color which goes so well with your kitchen. I have a hard time cutting my feed sacks/vintage fabrics. So Liked that you didn’t!
Thank you so much for this idea Angie! We just finished remodeling a farmstead with a 1912 4-square farmhouse. I found many feed bags in the old granary and wanted to make some pillow covers for the family that sold this farm to us. I tried washing them with a variety of soaps to see if I could bring some life back into them. Each bag has the farmer’s name on it. But the stains are horrific! I’m going to try to make a smaller frame to put part of a bag in. Maybe this idea will look better. I also have some old wood pieces from the farm to make the frame out of. These bags have been hanging upstairs in this old granary for decades! Wish me luck. I just keep on thinking that if this was my homestead, I would want some remembrance.
what a clever idea! (and yes, you made it make sense)
my “feed bag” at the moment is a box of Ritz crackers…..wonder how it would look framed……
Pinned.
So sweet! Well done, Angie
Thank you for sharing! This is a beautiful project! The tack idea is better than anything I have tried in the past and your explanation on ” how to ” is ” right on “