Thanks to all of your for your sympathy over the computer I drowned in the bathtub and the photos that were lost on it. My husband was able to recover some photos, but some months are missing, and I’m still looking through them to see what photos are left that he was able to find since he last backed up the hard drive. I still feel pretty dumb for drowning it, but you all were such good sympathizers, I feel better about it now – so thanks! 🙂
When we first bought our house more than 4 years ago, the kitchen was very outdated, and all the cabinets were made of pine. We gutted the entire kitchen when we remodeled it, but we saved the glass front cabinet doors, and reused one of them in the remodel (you can see the full remodel HERE). I also saved a large drawer that you can see in the bottom right side of this photo.

I think I sold the rest of the drawers, but or whatever reason I held onto the largest one. My husband has had it full of tools, ropes and junk in the garage since the remodel, but I spotted it last week, and because of its large size, I thought it would make a great farmhouse cabinet.
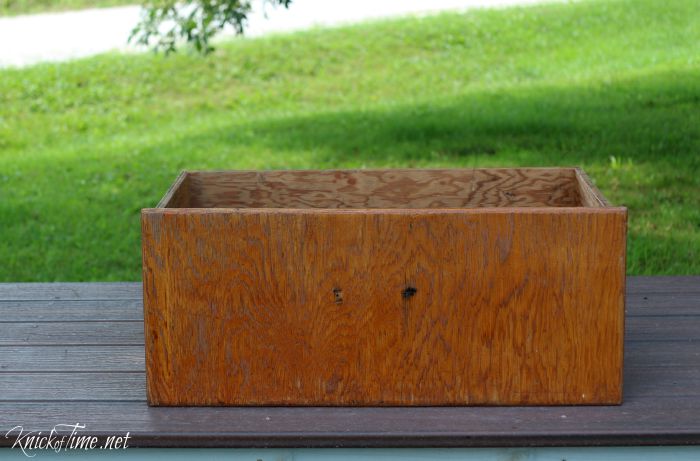
The interior of the drawer had a lot of stains, but nothing that a fresh coat of paint couldn’t hide.

The first thing I did was get a piece of beadoard cut to fit inside the drawer.
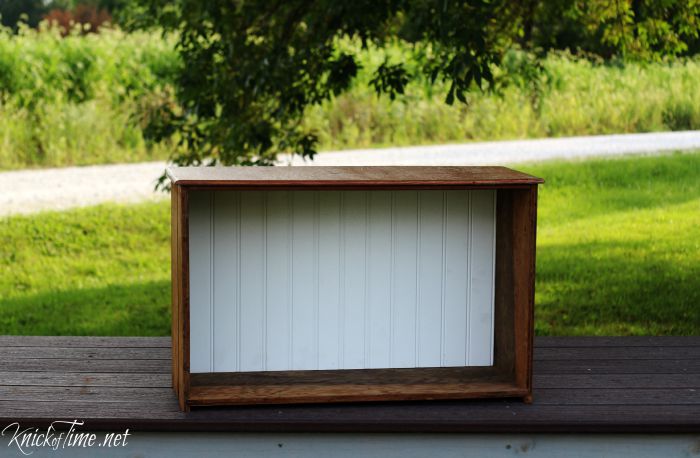
I didn’t want it to look like a drawer hanging on the wall, so my husband cut some 3″ wide furring strips to frame the sides of the drawer. I use furring strips a lot to make frames for things, because it’s very rustic wood and is super cheap – like a couple of bucks for an 8 ft. piece.
I started out thinking I’d paint the whole thing antique white (you can see some of that color inside), but it looked way to yellowish to me, so I ended up only painting the outside and the frame pieces antique white, an painted the interior bright white.

I also thought about putting chicken wire or metal mesh inside the framed area, but decided against it so that what’s inside the cabinet can be clearly seen.
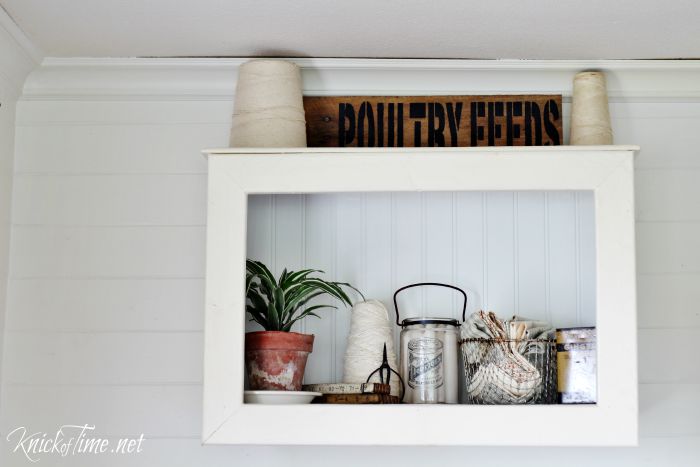
I put one of my favorite wire fryer baskets filled with fabric scraps in it, along with an old spice can, and a glass jar filled with candles. You can learn to add an image to a glass jar like mine has HERE.

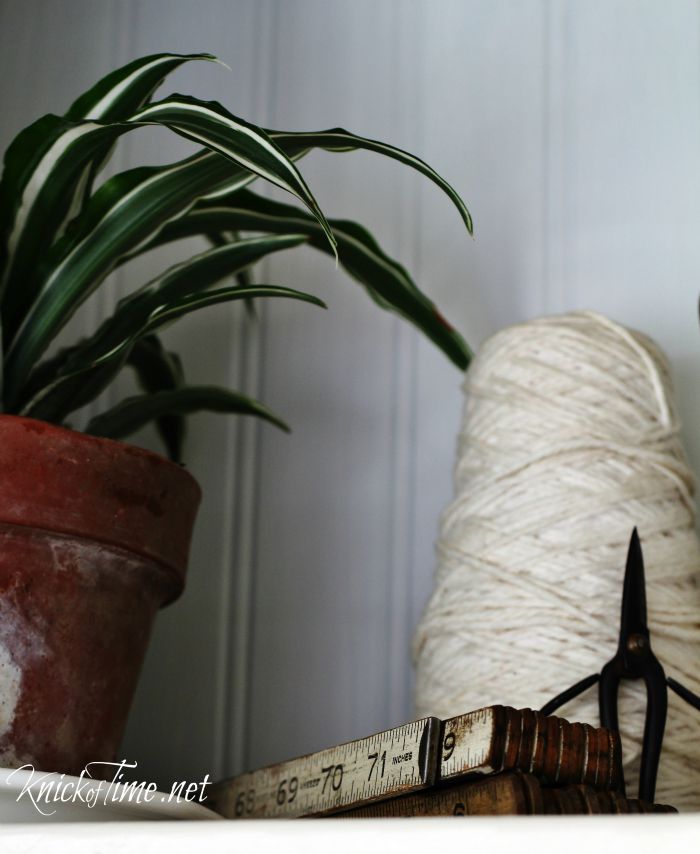
There’s also a plant, a few old rulers, some yarn and an old pair of scissors inside the cabinet.
Right now it’s hanging above my antique cook stove. Once our bedroom remodel is done (which is still a LONG ways away), I may move this cabinet in the bedroom, but for now I’m loving it in the kitchen.

Since I already had the paint, it only cost the few dollars to buy the furring strips, so this was basically a free project, and I’m happy to see the old drawer returned to the kitchen where it started out! If it could talk, I think it would tell me it’s glad to be back where it started too, and serving a useful purpose once again!
Wanna see more projects we’ve done for our farmhouse kitchen? Click on the links below!


That turned out really nice Angie. Love how you (and Mr. Knick of Time) framed the opening. Will have to remember furring strips. Nice size too … you could even hang a small picture over the wire basket. I have several old desk drawers but don’t think they are deep enough for that. Great idea. Thanks for sharing.
Audrey Z. @ Timeless Treasures
That is such a great idea. I’ve used drawers on the wall before, but never thought about framing them like that. Love the way it turned out!
Thanks Jeanette! I didn’t like the drawer much when it was a drawer in the kitchen, but I really love that old drawer now! 🙂
I’ve done almost the same, with much worse looking drawers. They are now shelves in my garden shed. As I didn’t do any “drawer remodeling” the went up as is, pull handle and all. I like yours better, and my try doing the same as I have a stack of drawers to go. Same kitchen remodel left overs. Love all your creative work.
Great re-use project, Angie…useful and pretty! Love the Watkins can…I have one of the Allspice on my kitchen hutch.
Thanks Linda! I’d love to find some more of the old Watkins cans!
What a great idea …love how you added the beadboard and framed it all in!
Thanks Tammy! I’ve convinced that beadboard makes anything look better! 🙂
I have some old drawers from the redo of my kitchen,what a clever idea. Thanks Angie.
Let me know what fun ideas you come up with for your drawers, Marlene!
I love this Angie! Great choice of display items too. Now I have to dig around and see if I threw out my old fryer basket! And I want to make a similar display cabinet with a glass door. I detest having to dust my displays!
Send me a photo when you finish yours Debbie – I’d love to see it!
Once again, you’ve outdone yourself!! The new cabinet looks awesome and you’ve given us another great idea on H O W to repurpose the drawer. I was amazed how your kitchen looked when you bought the house. You and your hubby have done WONDERS with it – turning it into a farmhouse kitchen is SOOO much prettier, I think, and I know you like it a lot more also! Keep up the great work. I, too, was so sad to read about your drowned computer and lost photos…I would be sick, too! Hopefully, you’ll retrieve LOTS of photos, even ALL of them! Have a groovy day!
Thanks so much, Mare! Our whole house was stuck in the 70’s when we bought it, so I’m overjoyed every time we get a room remodeled! We’re doing the bedroom now, and I can’t wait until it’s done!
Love it!! looks awesome and I have a full set of old drawers in my garage so here I go!!!
Good luck with you your drawers Jules! Have fun!
What an absolutely great idea! I’m going to look in the garage for an old drawer first thing in the morning!
Good luck in your quest, Naomi – I hope you find a great one to have fun with! 🙂
Angie
I have a drawer from when I very first moved into my purple house and renovated the main bedroom – by ripping out the horrific BIR.
I knew I HAD to keep one drawer but didn’t know why . . . . now I do.
Thanks for the awesome idea.
<3
Pia
Hi Angie….just saw this awesome post and LOVE it! I have a drawer saved from a buffet to tv stand redo and have been wondering what to do with it for a very long time. This is perfect! My question though is how you attached the strips to the narrow edges of the drawer. Especially at the new top edge.
Debbie, we used our nail gun to nail the frame pieces to the edges of the drawer. The edges of ours are about 1/4″ thick.