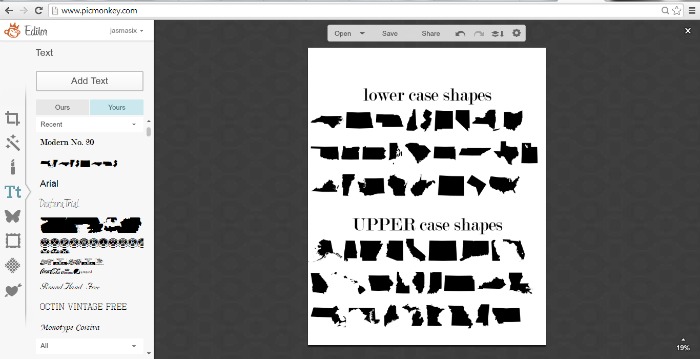
I discovered a new special shape font set “dingbats” last week, and this one could be used for so many fun projects. This font set has the state shapes of all 50 states, as well as various country shapes. It’s called DingMaps (download HERE), and it’s a free font. These shapes could easily be used to create stencils, but I used one as a super easy way to make state shape wall art on old book pages.

This project is crazy easy, but you need to download the font to your computer first. I’ve discovered that after I download a font, it’s best to restart my computer, so that the font will show up as an option in Picmonkey, or when using the Silhouette software. If you open those programs right after you download a new font, they won’t usually show up yet.
I traced around a piece of 8-1/2 x 11″ cardstock onto a page from an old atlas, so it would be the correct size to run through my printer.

Next, I opened up Picmonkey, and hovered over the “design” tab, then clicked on the 8×10 size. If you are doing a large state, just click on the design tab, and it will automatically open up as a square, which fits big states like Texas and Alaska better (as well as larger country shapes).

Once you have a design space open, click on “Tt” on the left side, then select “Add Text”. You’ll see the choice of “Ours and “Yours” – select “Yours”. That’s where any special fonts you have downloaded will show up.
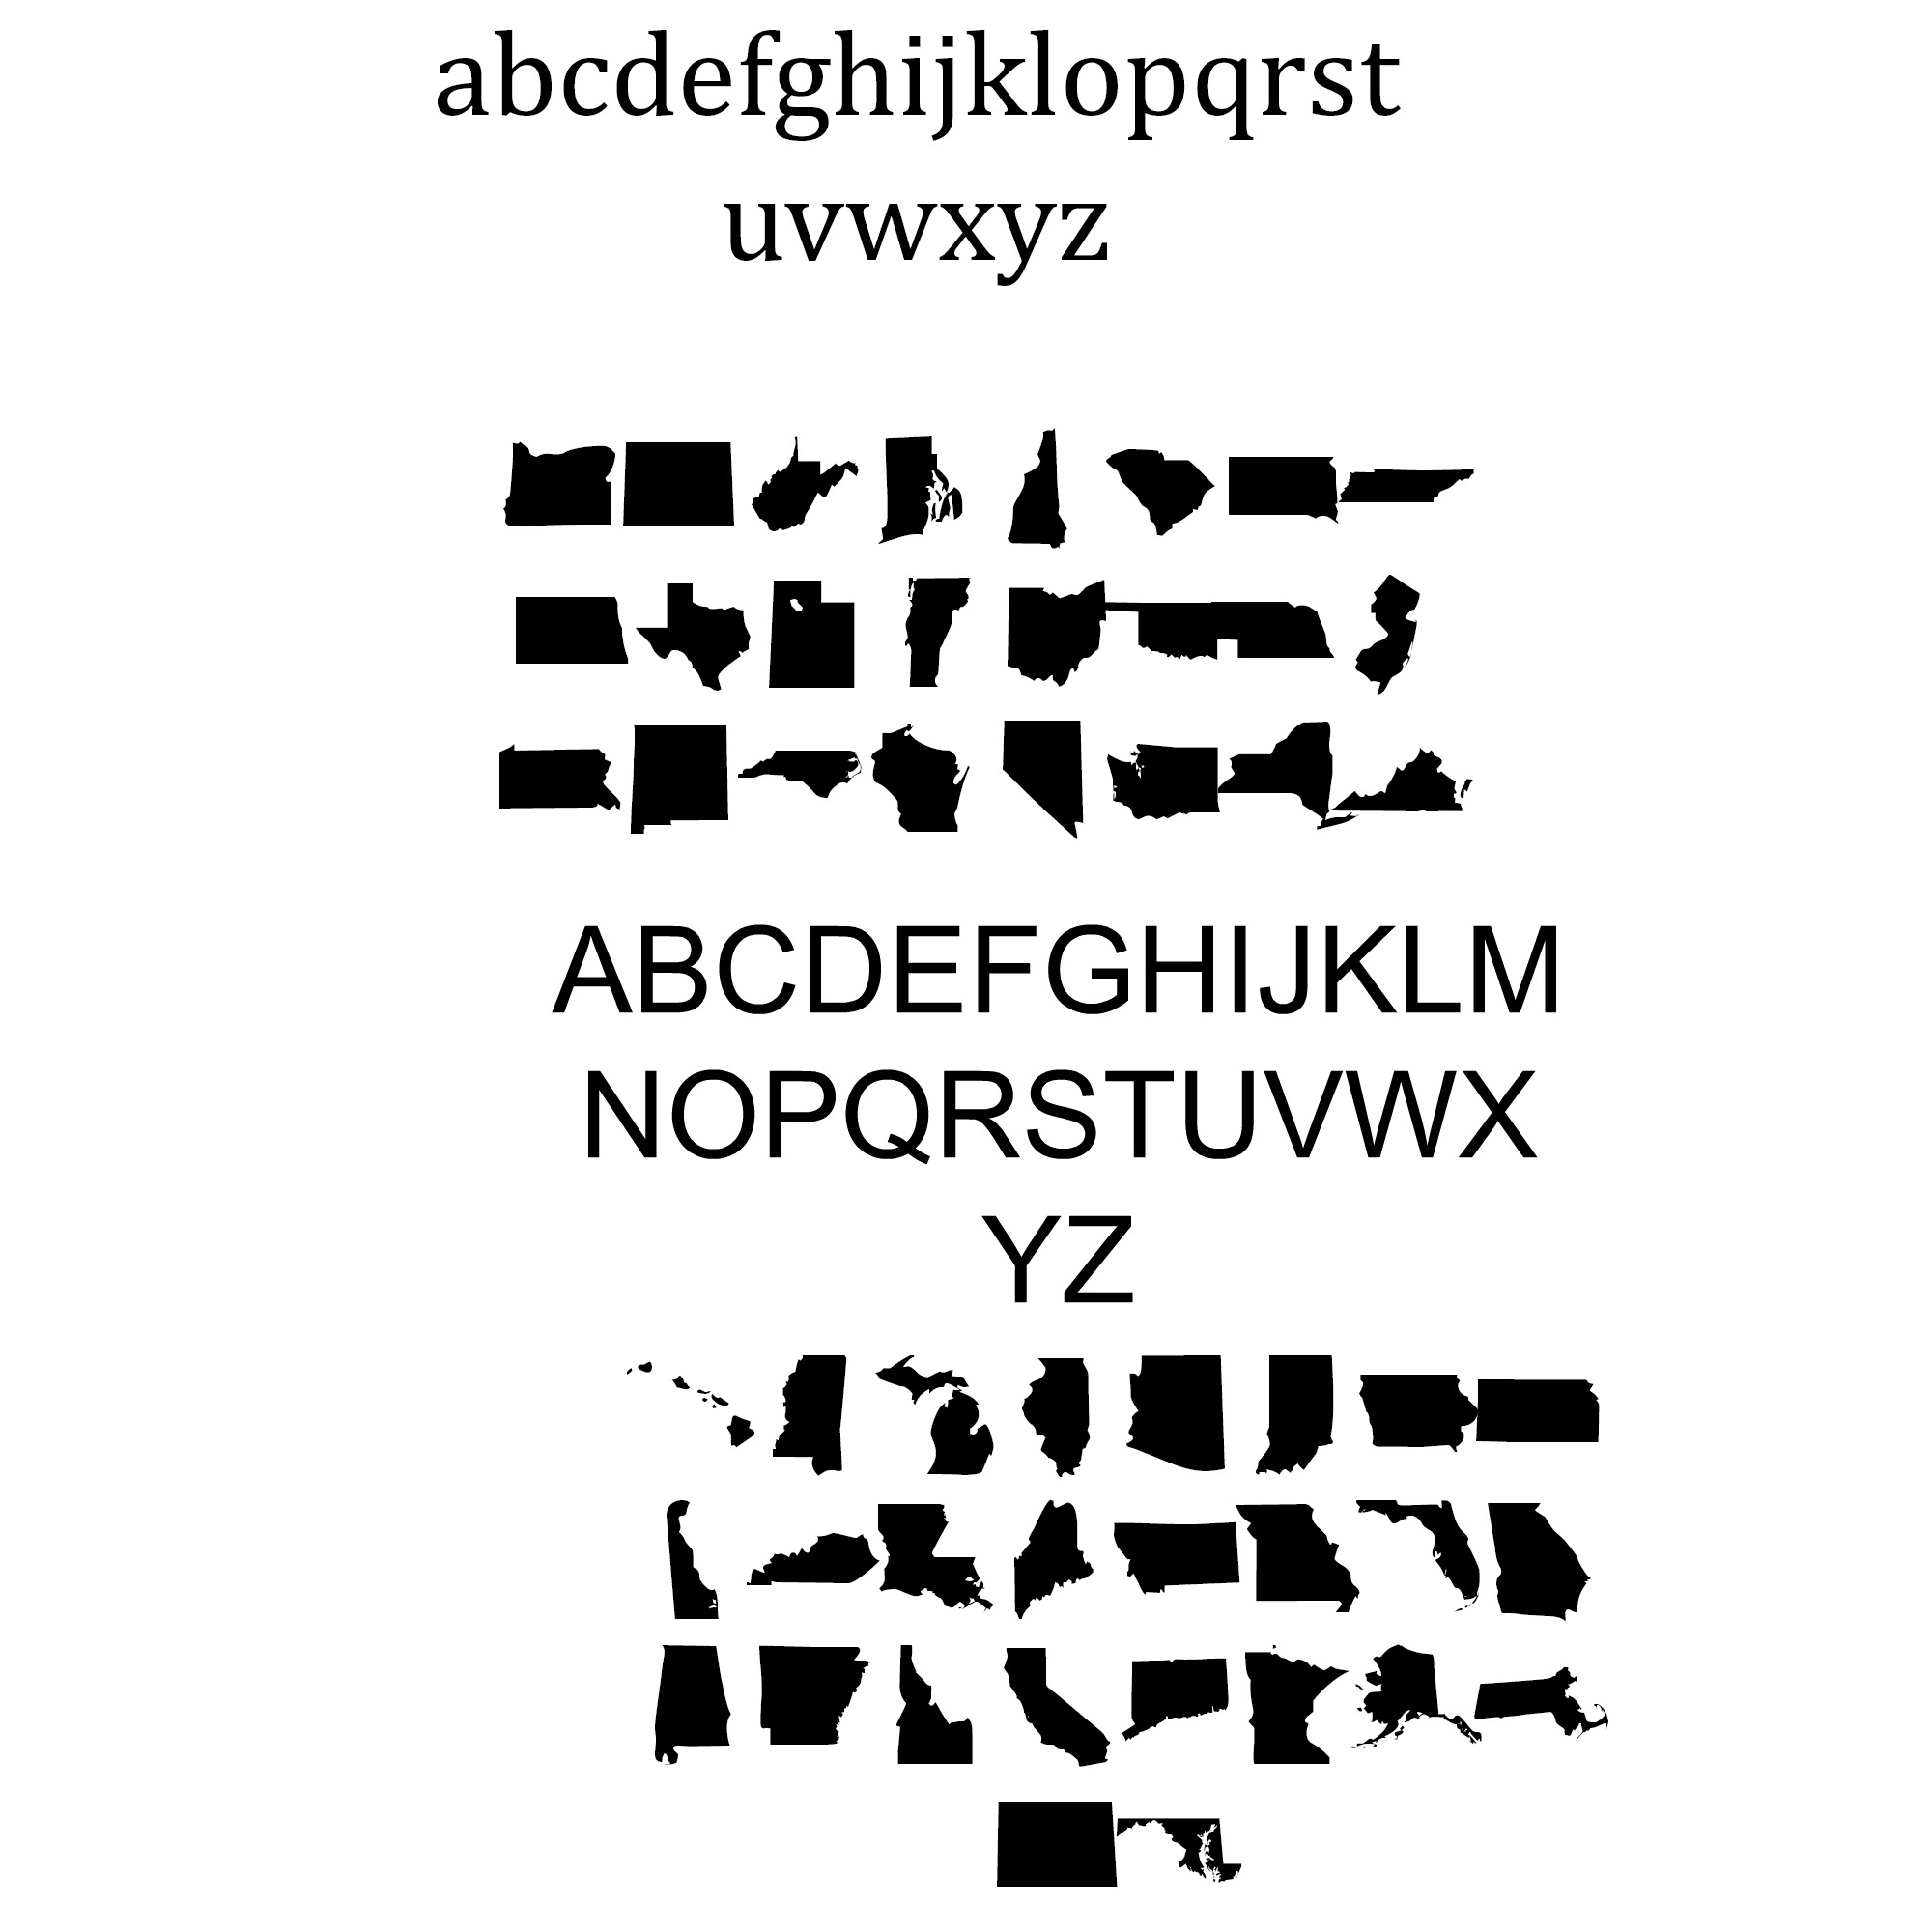
When using dingbats, I always type the whole alphabet, highlight the alphabet to select each character, then click on the shape fonts, so all the letters will turn into shapes. This helps me to find the shape I want. For my example, I used the Illinois shape, which is the letter “N” in uppercase. If you plan to make more than one, I would right-click on the text box, and select “duplicate”, so you don’t have to type the whole alphabet again. Just slide that duplicate off to the side of your design area, and bring it back to make another one.
Delete all the shapes you don’t need, so only the one you do need is left on in the design area. Enlarge the shape to fill the design area, and save it to your computer. You can also add optional text above or below, or even inside the state shape. I added, “There’s no place like Home” on mine, but it could also say something like, “Somebody in Illinois loves you”, or the name of the state.
Once you have that done, just find the image on your computer, and print it on the book page you have loaded into your printer. I advise doing a test page first, and making a mark that indicates the top of the page, so you know which direction to put the book page in your printer tray.
If you don’t want to tear apart a book, you can also print vintage dictionary page image, and use that as your book page to print your map image on.
{CLICK ON IMAGE TO ENLARGE}

I used the same frame that my Mrs. Claus Cookie Co. print was in at Christmas. I just placed the state page over the top of it (tutorial to make the frame HERE). It took me longer to type this post than it did to make my state shape print! It’s that easy. I think these would make really nice, and very inexpensive gifts, they could also be used to commemorate a vacation. If the shape you select is large enough, you could could even use Picmonkey to layer a photo image inside the shape. Imagine putting a photo from your vacation, inside the state or country you visited.

Dingbat fonts are so fun to create things with, and there are hundreds available for free. So many projects…so little time!
See more REPURPOSED BOOKS projects HERE.


How cute! And so easy.
Thanks Tina!
You are so awesome! Oh my, how I wished my brain was wired like yours! Until the rewire job, thank goodness, I found your blog!
I see stuff using states art everywhere lately, so this is definitely a “thing” right now. What a wonderful project and I like that you make use of old atlas pages, too!
I love the frame! Just reading this confused my mind. “Easy” for you to say 🙂
I love this idea! Now, if I can just figure out how to do it. I have used Picmonkey a lot, but cannot seem to get the Dingbats to work. You are so helpful to some of us technically challenged folk!
Cheryl, did you download the font to your computer, then restart your computer? It won’t show up as a font on Picmonkey until you do that first. Let me know at what point you get stuck, and I’ll try to help!
I may have to stop reading your blog (or buy a bigger house)! Too much cute stuff!!!
I love this idea and can’t wait to try it!
Thanks so much, Paula!
I think my favorite part of this piece is that you printed it on the atlas page! So cute and innovative.
xo Ashley
Aw, this was a very nice post. Taking the time and actual effort to
create a top notch article… but what can I say… I
hesitate a lot and don’t seem to get nearly anything done.
Thanks so much, Celia!
Love this. Thank you so much. I was also on the page for the 1900’s Maps of the States. But, the page would only load through Rhode Island. I’d LOVE to have the one for West Virginia. I tried to comment on that particular page but, even though I could read other comments on it, I couldn’t find the comment box to leave my own. x