I’m super excited about this week’s Photography Friday lesson, because I learned about changing aperture to get the cool “bokeh” effect (blurry background) in my photos.
Here’s a beautiful example from Anne @ White Lace Cottage. See how the roses in the silver pitcher take center stage, but the baker’s rack in the background looks beautifully out of focus?
Last week, we learned about changing the ISO setting, and what it does and why it’s useful, so if you missed that, check it out first, before moving on to Changing Aperture.
Aperture is the amount of light that comes through an opening in your lens, and it affects the in focus or blurriness of a photo, which is called “depth of field” Aperture is measured as F-stops, for example f/1.8, f/2.8, f/22, and each lens has its own range of aperture settings. For example, my 50mm lens has aperture settings from f/2 to f/22. Some lenses have a lower f-stop setting, like f/1.4, which would give you even more of a bokeh effect.
In order to change the aperture, you’ll need to locate the setting marked “A” or “AV” on your camera menu. This diagram shows you how the size of the opening in a lens changes, as you change aperture settings.
Aperture can be a little bit confusing, because the smaller the number, the more light comes into your lens, and the more blurry and less in focus everything in front and behind your subject becomes. The larger the f-stop number, the less light comes into your lens, and everything in front and behind your subject becomes more in focus.
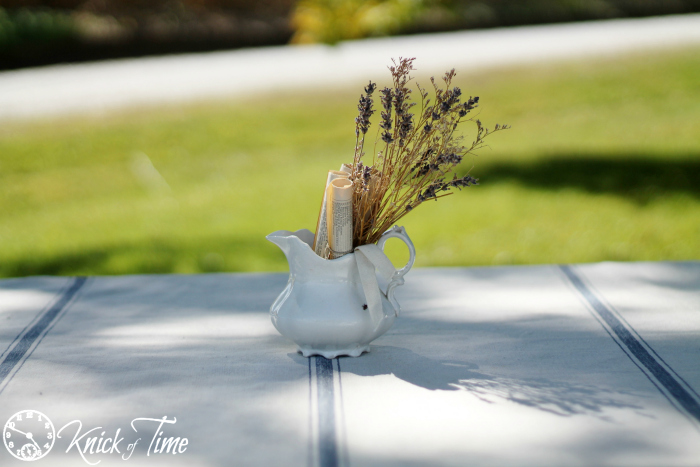
To practice changing aperture, I went outside to take photos of a little pitcher, sitting on my picnic table, with grass and my gravel road in the background. Since I was shooting outdoors and had a good amount of natural light, I could set my ISO on 100, to get the sharpest image, with the least amount of graininess (see last week’s lesson about that).
In the first photo, I had the aperture set to f/2, which is the highest aperture (lowest f-stop) so the aperture was wide open, making the grass and road behind the pitcher blurry, and the grain sack tablecloth in from is the pitcher is also less in focus as well, but the pitcher is very sharp and in focus (including the beetle that landed on the pitcher).
In this photo, I changed the aperture to f/11, and you can see that the background and tablecloth became more in focus.
For the next shot, I changed the aperture to f/22, which is the lowest aperture setting (largest f-stop) my 50 mm lens has. You can see that the grass and gravel are now much more clearly in focus, as is the tablecloth in front of the pitcher. You can see the texture in the weave of the fabric, which you couldn’t see at a larger aperture.
Using a low aperture setting is particularly useful when taking photos of people, where you want them to really stand out as the subject of the photo, or something like a butterfly on a flower, so there is a very small depth of field. On the other hand, if you were taking photos of your entire kitchen, you would want the whole room to be in focus, so you would use a high aperture setting, giving you a broad depth of field.
Next week, I’ll be learning about shutter speed, which is the last component of taking a properly exposed photo, so I hope you’ll join me again then, and are practicing your skills between lessons. To take the Shoot Fly Shoot lessons yourself, click on their ad on my sidebar.
Happy Shooting!


Thanks Angie! I’m really enjoying these photography lessons. I’ve had my new DSLR for a while and have not ventured away from the “auto” button for fear of not knowing how to use the settings and not taking the time to learn. You have inspired me! Love the plain simple explanations, it’s just what I needed. Thanks!
I’m loving your lessons Angie! I’m just taking baby steps with my DSLR, learning a bit at a time how to go manual. It’s a lot to learn but you’re making it easier 🙂 Thanks!
Sorry I’m stuck here … “in front AND behind “, how can it be both? help ….!
Maggie, whatever the subject of the photo is, the background behind it, as well as whatever is in front of it, will be blurry. For example, the grain sack tablecloth in front of the pitcher is more blurry when I changed the aperture. Hope that helps!