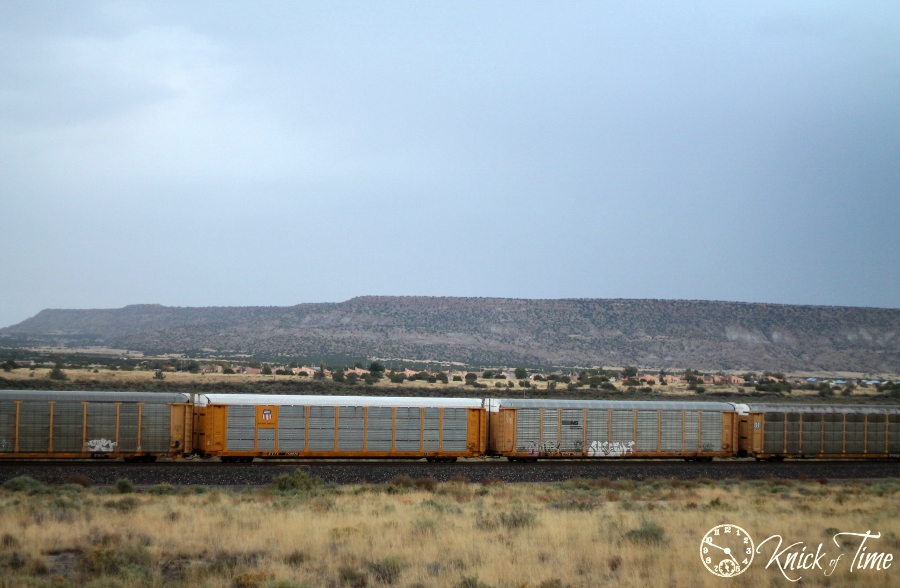
I wasn’t sure if I would be have a chance to practice my photography lessons while on vacation this week, but while my mom, sister, niece and I were returning from a trip into Albuquerque, the perfect opportunity came up, because I needed a moving object to photograph. We passed a moving train, and my sister got far enough ahead of it, that we were able to pull over to the side of the road, so I could get set up with my camera before the train caught up with us.
This week I learned how changing the shutter speed on my camera, can create some really awesome effects with my photos – showing movement in a photo, or “freezing” movement in a photo.
Shutter speed is one of the three elements that affect the exposure, or lighting in photos. The other two elements are ISO, and Aperture, and you need to understand those two aspects first, before you can begin playing with shutter speed, because when you adjust one, it affects the lighting in the other, so don’t miss those two parts in my photography series if you missed them.
The difference between aperture and shutter speed is that aperture controls how much light comes into your lens, but shutter speed controls how long the light comes in.
Fast shutter speeds mean that your shutter is only staying open for a fraction of a second and not much light comes in, which makes your photos darker, so you have to adjust your ISO and aperture to make up for that. The benefit of a faster shutter speed is your photos can freeze movement, which you’ll need if you are taking something like running children, and you don’t want them to be a blur. You can use your camera without a tripod when shooting with a faster shutter speed.
I shot this photo at a very fast shutter speed (1/2000), which means the shutter opened and closed super fast, which “froze” the movement of the train, so you can clearly see the details of the train, but can’t really tell if the train is moving or not (it was moving fast).

I shot this photo at a very slow shutter speed (1/15), and can see that everything in front and behind the train is in focus, but the train shows the blur of movement, because the shutter stayed open longer.
You can see the benefit of changing shutter speed, if you wanted to take a photo of something like a waterfall, or dripping water. A faster shutter speed would freeze the movement of the water, whereas a slower shutter speed would show the movement of the water. It really opens up so many more possibilities in photography.
I am SO glad I finally decided to take the online classes from Shoot Fly Shoot (see affiliate ad on my sidebar). The older I get, the less I remember, and I love the benefit of being able to watch a lesson over and over, until I really understand it. I usually watch the lesson a few times, and review it again right before I’m doing to go practice with my camera. It really sinks in better for me that way.
How about you? Have you been learning to use your camera in manual mode? I’d love to hear what you’re learning!


Great tips on shutter speed and adjusting the other measurements to keep the moving object in focus. practice, practice. Now if I could only remember these things when I’m out shooting photos. this is a helpful series.