DIY Farmhouse Decoupaged Galvanized Bucket
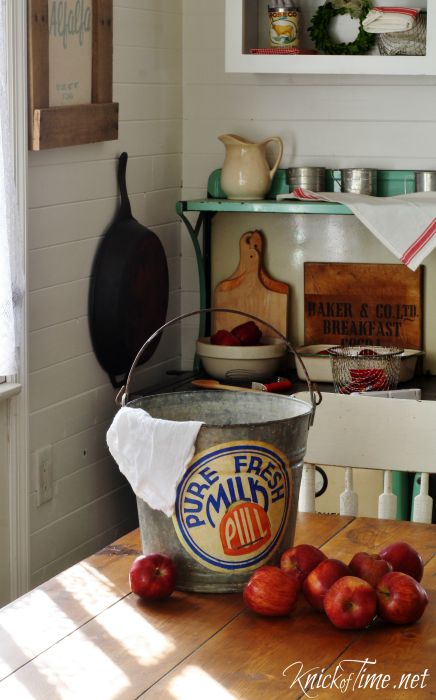
I promised I’d show you the project I made using one of the milk cap image printables I shared yesterday, so I got up early this morning to take photos of this decoupaged bucket in the kitchen, when the sunlight is so pretty shining through the window.

This is a project that takes about 5 minutes, plus a little drying time. If you don’t have a galvanized bucket, it would work well on other things too. I picked up my galvanized bucket a few weeks ago and originally planned to do an image transfer on it, like I did this bucket, but decoupage is quicker and easier, and you don’t need to reverse images before printing them.
SHOP FOR GALVANIZED BUCKETS HERE
How to make a Farmhouse Decoupaged Galvanized Bucket
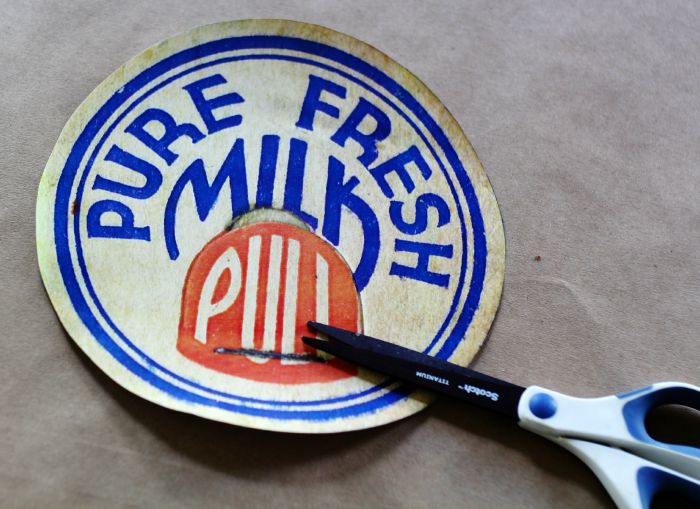
I printed the “pure fresh milk” cap image as a full page image and cut it out. Trim as closely around the edges as possible.
You can use Modge Podge, but I usually use plain school glue. I just paint it on the back of the paper with a brush.
Position it on the bucket, making sure the paper is pushed down into the grooves. Every few minutes, smooth it down again, to make sure it is adhered well.

I used satin spray polyurethane to seal it once the glue was dry.

This would make a cute bucket for holding apples or potatoes, or a few firewood logs, but would even make a great trash can.
It’s available in my online shop HERE. (SOLD)


Angie, that looks awesome! I love the idea of decoupaging the print! Thanks for sharing!
Thanks Linda! 🙂
Angie, this is adorable!
Thanks so muchc, Dianne! 🙂
Adds just the right amount of character to an othewise average piece. Love it!
Gosh Angie, I just can’t keep up with you … you offer so many inspiring craft ideas and I want to do them all. Love your bottle caps and how you used this one on the old bucket. Looks like a quickie, so maybe dueable for me. Thanks for all you offer.
Hugs,
Audrey Z. @ Timeless Treasures
Believe me, Audrey – it’s a super quickie – have fun! 🙂
Angie, the label makes all the difference in the world, taking a plain bucket and making it stand out as something special.
Thanks so much, Mary, and glad your comments are showing up now! 🙂
Really cute and a have the perfect bucket to use,thanks Angie,you always get my creating button moving. When you get older you have ideas but sometimes you just plain forget. lol
Thanks Marlene! I’m hoping to find more old buckets, because I could really get carried away with them!
Anglie that is such a great idea, it takes a simple bucket and makes it shine!
I love it!! Your printables are awesome, and this is something I can do! Yay! Great Christmas gift filled with cookies and candy. On a little smaller scale, of course! Thanks again for an awesome idea. Blessings
That’s a great idea to use it as a gift bucket!
I’m loving the bucket with your milk cap design. Thanks again for inspiring us daily!!!!
Holy moly…your bucket looks spectacular! I love how the colours are just as vibrant or even more so than they are on the milk cap! I would’ve never thought of using a decoupage method on a galvanized bucket, but you’ve shown it works remarkably well…I want to try this!
Thanks Susan! It’s just about the world’s easiest project! 🙂
Yep, I love it too. I don’t have a bucket to try it on but I ‘ll bet it would look great on tin cans.
Hey Angie … this is adorable! Would it also work on an Enamel Bucket?
Maggie, yes, it should work fine!
Love this project, Angie. Must pin and must try!
Just picked up a bucket at a yard sale last week. Yours is beautiful. I hope you don’t mind…i’m gonna to copy yours. Thank you for the images you pass along.
Have fun, Tina – I’d love to see a photo of yours when you finish it!
Real cute idea! I saved a couple of the images, so I will be making one for myself!
I think this is such a great way to add farmhouse character to a galvanized bucket. I have several of these from the Tractor Supply Co. I’m going to give this a try! Pinning your post, too.
Thank you for linking up with us at the #HomeMattersParty this week!