DIY Rusted Tin Cans Succulent Planters & Patina Paint Review
Learn how to create Rusted Tin Cans Succulent Planters. They make adorable gifts or party favors for adults. Be sure to make a few extra to keep for yourself!
If you’re new to my blog, you might not realize that I love old things, especially things with patina and even rust.
I even wrote a post about rust being like a joke.
So when I learned that you can make real rust on metal with patina paint, I had to try it!
Patina paint is infused with bits of metal pieces and reacts when the patina spray is applied.
It comes in three colors: iron, bronze, and copper. I’m using iron today because I really wanted to see if it would actually create rust.
I’ll give you the supply list first, then the tutorial.
If you won’t be using patina paint on anything metal, like the cans I’m using, you don’t need the Prime Start.
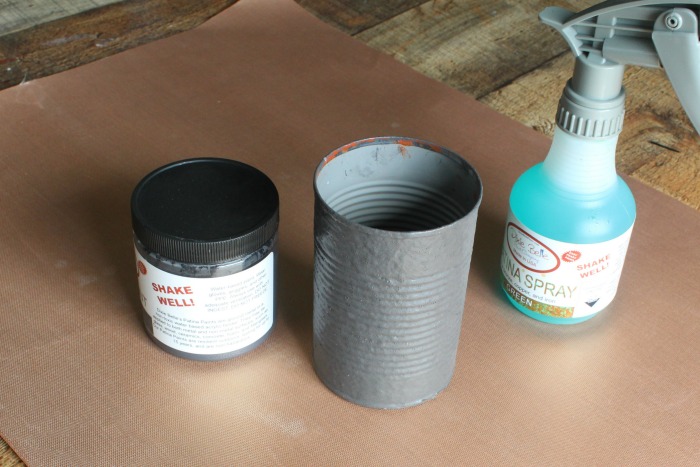
The patina spray comes in two colors – blue and green.
Green is to be used for the iron color. Blue can be used for the bronze and copper paint. That will give a verdigris effect like the Statue of Liberty has.
Supplies Used: *Affiliate links included to help you find the products I used.
- Tin Cans
- Foam Paintbrushes
- Dixie Belle Prime Start Patina Paint
- Patina Spray
- Disposable Gloves *These are the very best gloves. I use them over and over -No waste!

How to DIY Rusted Tin Cans
Making rust and patina is a multi-step process. It’s best to do as many as you want to make all at one time.
- Put on rubber gloves. This process is messy. I didn’t wear them and got product all over my hands.
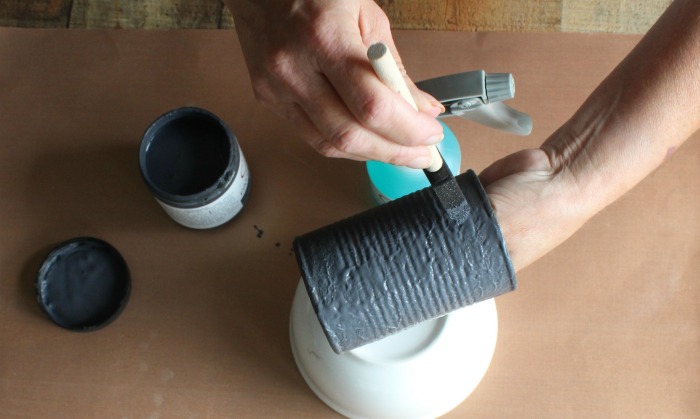
- Stick your hand inside the can.
- Shake the Prime Start well and apply two coats, allowing each coat to dry.
- Shake the patina paint and apply a coat with a new foam brush. Stipple the paint on rather than brushing. It will look more authentic. Allow the paint to dry.
- Wrap up the brush. You’ll need it again.
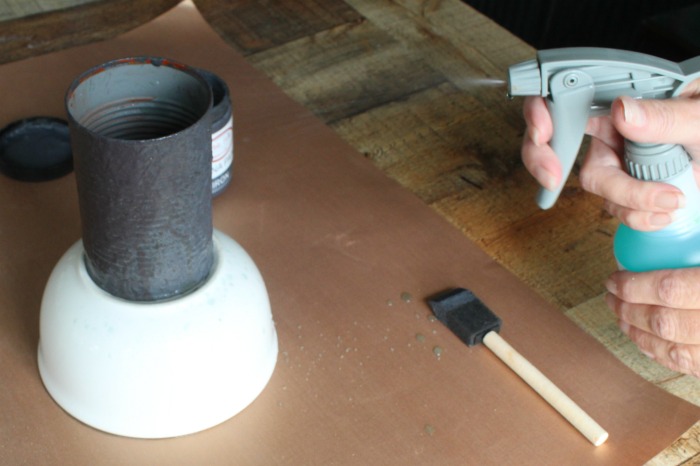
- When you’re ready, unwrap the brush and apply a second coat of patina paint. While the paint is still wet, spray on the patina spray.
- Leave it to dry. After a while, you’ll see the magic start!


The result! Isn’t it amazing?

It looks like they’ve been outdoors for years. I’m wildly impressed with Patina Paint.

After the rust effect was complete, I sprayed my cans with a clear sealer. If you don’t, they will continue rusting.
I can’t wait to try the other colors on different surfaces!
So, what do you think?
I’m just amazed that this product created real rust. I’ve seen a lot of faux rust tutorials, but this is the real deal!
Which color would you love to try?
Before you leave, check out the rest of my repurposed tin can projects!

Vaya con Dios,
Angie


I love rust! Esp outside in my garden. It just adds so much. Thanks for sharing.
I agree Pam. I love using rusty things in my garden too!
That does give a great rust look, Angie…looks so wonderful with green plants! Thanks for sharing!
I’m looking forward to trying Dixie Belle’s other patina paints Linda. I was so impressed with how well this one worked.
That is very cool, Angie! Like you, I am always enamored of old, rusty things. And it looks pretty easy. I’m gonna keep this method in mind. I’d like to find a rally big tin can–you know, like restaurants or cafeterias get foods in. Then I would do a rust treatment on it for a deck planter for next summer. Thanks for introducing us to this new product and method.
Great Idea Naomi! I actually Have one of those big cans.
I love Dixie Belle’s patina collection. And it worked perfectly on your cans. I’ve used all the colors and the rust is my favorite!