Spring is less than one month away and I’m prepared! I made a Spring chalkboard art and a DIY sign that I hope you’ll love.
Both projects are oh so easy to make!
Thanks for all the ideas about my Thrift Store Finds. It helped so much!
Today I chose Harvest, one of the new “Chalk Stories” transfers by Chalk Couture, to make these quick and easy projects.
The Chalk Stories collections can be used alone or in any combination.
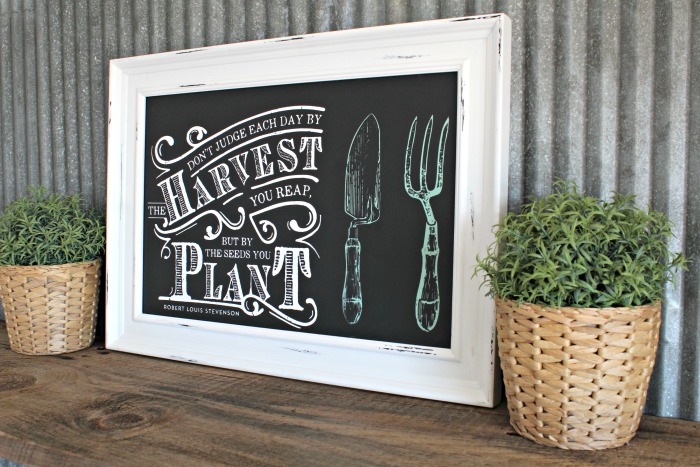
I chose one from the Home Grown collection that has a quote by Robert Louis Stevenson with the garden tool elements.
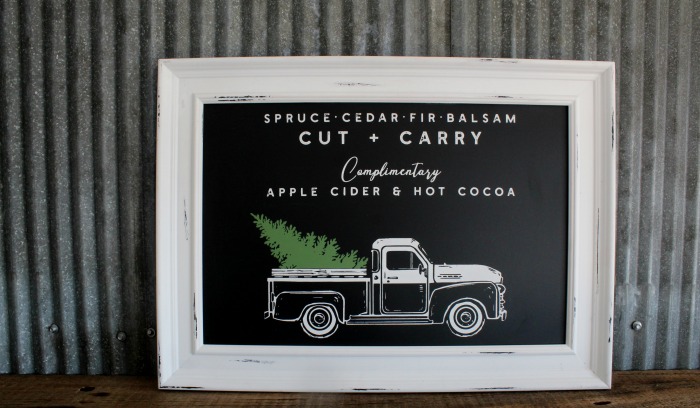
I’m not going to lie – I was a little sad to remove the Vintage Truck from my chalkboard. But next Christmas I can just make it again!

Now it looks like this! I used the same colors as in the Spring catalog but kept the tools together instead of putting one on each side of the quote. I often don’t cut the transfers apart right away. It’s just easier. I’m kinda lazy like that.

The artwork is so detailed and stunning. It’s hanging in my kitchen now.

Next I made a sign.
I bought a six-foot board and had the store cut it in four pieces. Pine boards are the cheapest and I love the knots and grain.
Staining the wood brings out the beauty. My go-to color is Early American.
Wood stain will separate in the can, so stir it before using.

 For the sign, I covered the Robert Louis Stevenson quote with washi tape and just chalked the rest.

Here’s how it turned out. The green paste is a perfect match with my faux IKEA plants.
It is available for purchase HERE.

Spring Chalkboard Art & Sign Supplies Used:
- Chalkboard – I used THIS ONE
- Pine Whitewood Board (for sign)
- Minwax Early American (for sign)
- Harvest transfer
- Chalkology Paste White
- Chalkology Paste Eucalyptus
- Chalkology Paste Garden Herb (for sign)
- Squeegee
- Disinfectant Wipes
Instructions:
- Fuzz the transfer and apply it to the selected area on the chalkboard or tray.
- Press down to seal the silkscreen area.
- Use the small squeegee to apply the white Chalkology over the silkscreen area. Make sure all the silkscreen area is covered.
- Squeegee off the excess and put it back into the paste container to use later.
- After all the layers have dried, apply a clear coat to seal the decor. If using the designs on a chalkboard, no sealer is needed if you want to remove the designs later.
The transfers are reusable many times, so you will want to take care of them. After you have completed your project, clean your transfer with water then use a disinfectant wipe on the sticky side. Lay flat with the sticky side up to dry. When it’s dry, place it on the backer sheet again.

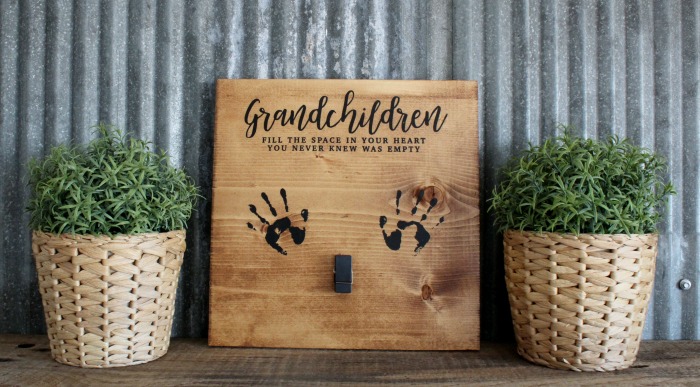
I also made a new Grandchildren photo holder sign because the other two sold right away. This one is a little different. It’s square and has a thick black clip. It has a hanger on the back.
It’s available HERE.
See more:
Galvanized Farmhouse Style Bucket Planter

Join my VIP Facebook group for sales, deals & giveaways HERE.
View the Spring/Summer catalog HERE.
Join my team and Get $240 in product for only $99 HERE.
Follow me on social media below:
Pinterest
Facebook
Instagram
Twitter
Vaya con Dios,
Angie


Perfect for spring…and I love the wood color, too, Angie!