Farmhouse Style Thrift Store Lamp Makeover
I made a quick run into the thrift store last week hoping to find some old metal fryer baskets like the ones I have hanging in my kitchen. But I walked out with … a lamp. Does that happen to you?
It happens with me All. The. Time!
I didn’t think I really needed a lamp, but but the price good, so in the cart it went.

What clinched the deal for me though was the linen lamp shade.
Have you seen the prices for these things new in the store? It’s crazy. You can buy an entire new lamp for the price of a shade, so I wasn’t walking away from it for 4.99.

I digress though… 🙂
All in all, the lamp was in good condition. It had some scuffs that looked like it had been pushed against a painted wall. I wasn’t into the brown glossy look though, and I wanted to give the shade a farmhouse style look. So here’s what I did:
Farmhouse Style Thrift Store Lamp Makeover – The Lamp Base
Supplies used (includes affiliate links for your convenience):
Spray paint for ceramics ( I used this brand.)
Adhesive remover (to remove sticky price tag)
Sandwich bag
Painter’s tape
Directions:
Peel off the thrift store price tag and use the adhesive remover to get the sticky residue off.
*Side note – I think thrift stores pick the stickiest, worst stickers they can possibly find!
Clean it really well. (I used a rag dipped in hot, soapy water.)
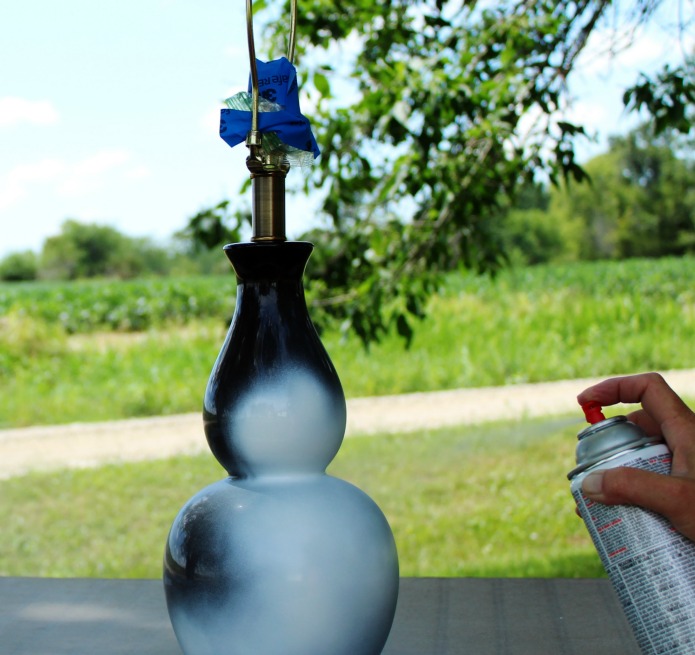
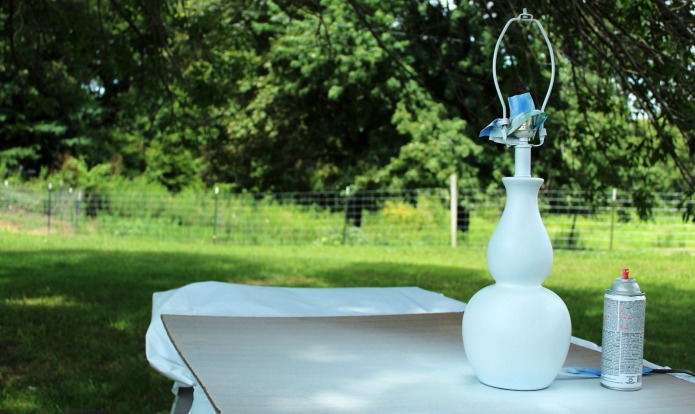
Wrap a sandwich bag around the bulb socket and secure with painter’s tape.
Shake the spray paint can for 1-2 minutes, then holding it 6-8 inches away from the base, use sweeping motions to paint it. Do light coats and repeat as necessary. I did two coats, air drying between coats.


Farmhouse Style Thrift Store Lamp Makeover – The Shade
Supplies used:
Stencil (I used Farmer’s Market.)
Painter’s tape (This is the best brand!)
Paint
Stencil brush
Directions:
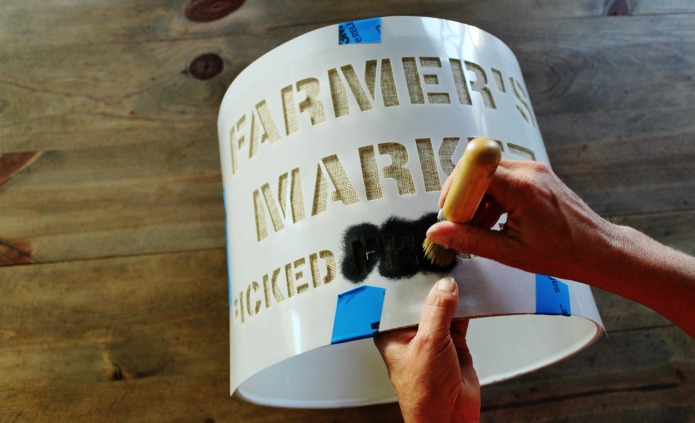
Tape the stencil in position with painter’s tape.
TIP #1 – Don’t scrimp when it comes to painter’s tape. Buy quality tape that sticks well, but doesn’t damage what you stick it to. The tape might slip when you’re painting. #beentheredonethat
TIP #2 – When stenciling on a curved surface, it’s easiest to hold the stencil flat against the surface and paint one letter at a time.

I pressed against the shade from the inside while stenciling to make it a firm surface to press against.

And it turned out perfect!

I didn’t have a bedside lamp in the guest room, so I moved it out there.


It’s a bit large for the space, so I may keep my eye out for another lamp to make over now that I know how well it works.

My guest room is my favorite room to decorate, even though it’s in a detached house.
To see all the different looks and projects I’ve done for the guest house, click HERE.
![]()

Vaya con Dios,


That looks great, Angie! I love how you transformed the lamp!
Thanks Linda! 🙂
Really like this one, good job.
Thanks so much, Judy!
Love your lamp and it really stands out in this room with the other decor.
Thanks Marlene. If we ever decide to move, I think I’d miss my little guest house the most.
Just your style and it fits in the guest house perfect. Thanks for the tutorial. Although I pretty much clean anything plastic or ceramic with alcohol too besides the soap and water. Sandi
Thank you, Sandi!
I’d never have thought some white paint on that lamp would’ve made such a huge difference but it did. Great idea & thanks for sharing it.
Thanks Laura! 🙂 I don’t use spray paint very often, but I knew I’d get better coverage without the brush strokes on this lamp.
What a beautiful makeover!! I really love what you chose to do, the phrase there looks super stylish. Love it!!
Thanks so much, Kelly! I couldn’t believe how well stenciling on the shade turned out, so I’ll be doing it again for sure.
Love the linen shade and your giveaway! If I win I would like #2, 24 & 28. Thank you!