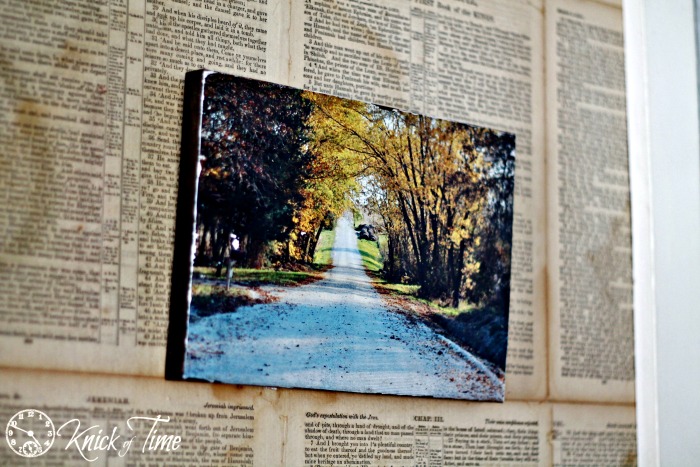
Did you take any photos this autumn, while the pretty leaves were still on the trees? I’m so glad I did. It’s a great excuse to get outdoors and enjoy the beauty that surrounds my home. Two of my favorite shots were of the view looking down the gravel road that’s in front of our house. One of the shots was taken on a beautifully foggy morning, and the other was taken on a bright and sunny day. Taking photos doesn’t do any good, if you don’t preserve them in some way to enjoy them, so I set out to do that right away, before I forgot I had taken the photos.

If you’ve never done a photo transfer to wood before, it’s a super easy project. You’ll find my tutorial for it here. You can see where the arrow is pointing, that occasionally, a bit of your image may come off when you are transferring it. It doesn’t bother me, but if you don’t want that to happen, I recommend decoupaging your image instead, as I did with our family photo on canvas.
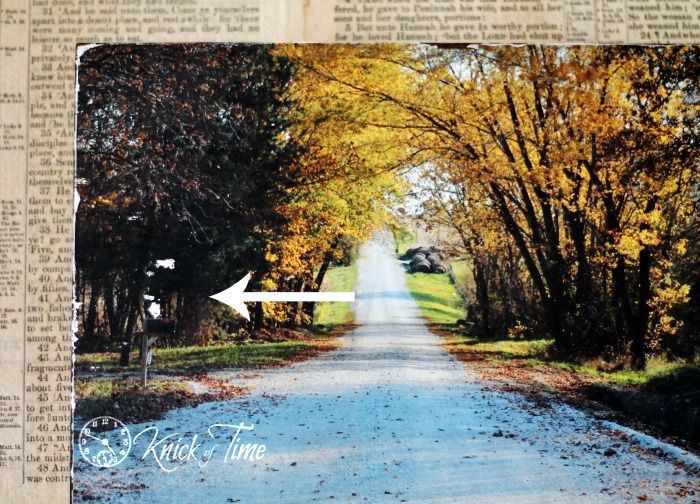
I used a piece of new wood, leftover from another project to transfer the image on. Usually, I paint the wood, but decided to just stain it, so the dark edges would compliment the browns in the photo. I screwed some wire onto the back to hang it by.
I bought myself a big new bottle of Modge Podge Photo Transfer Medium, so I’m stocked up to make more. I’d love to do a gallery wall in my entryway with outdoor photos I’ve taken around my home this year. They would all compliment each other well, so the photo I took of the abandoned cabin in a cornfield is the next one I plan to transfer to wood.
These take very little time to make – most of which is drying time, although I usually just blow dry it to speed up the process. They are so inexpensive, so these are perfect to make as gifts – especially for grandparents, but newlyweds would love them too.

Free printable photographs can be found HERE.


I love this idea….great job and beautiful picture. Thanks for the inspiration.
Thanks Holly!
looks great, Angie! I’ve got to try this again one of these days! My first attempt was a bit of a mess.
Oh, try it again, Cindy! You’ll be hooked on it once you do! The key is to not get any of the transfer gel on the back side of the page, because you won’t be able to rub the backing paper off that part if you do.
It’s beautiful! I think I’ll try it with some of my pretty fall photos. I was wondering…you mentioned using OmniGel in the tutorial that is linked, and then Mod Podge Photo Transfer Medium on this post. Which works best for you? Thanks for sharing!
Judypimperl.blogspot.com
Judy, I’ve used both Omni Gel and Modge Podge and both work great. I used to have to order online, because neither was available to me locally, but I can now get the Modge Podge at Hobby Lobby, and don’t have to pay shipping costs (and can use a coupon!)
Okay. Thanks so much! I have a Hobby Lobby, so I’m good to go!
Judy
turned out great Angie- I’ll have to give this a try…
and your re-vamped site is looking great – I love the clean looking style with great fonts – excellent job!
Thanks so much, Amy!!
An idea so easy I think I could even do it. My mother taught me to use felt tip markers to hide white spots where we don’t want them, so this could be done where the transfer is white. Permanent markers come in all colors today, so it is easy to even use them on fabric. My mother first taught me to do it on the seam of dark jeans where they were stretching at the seams — not that any of us would have jeans that are a little tight! LOL I also have used them where a spot of bleach has hit a print fabric by drawing in the print with permanent markers. I kind of got off the subject. Love your blog even though you don’t often hear from me. Blessings
That’s a great tip, Nancy! I love hearing from you, whenever you have a chance to leave a comment!
Pinned it. Christmas is coming.